The milk temperature is too high.
Check the temperature of the milk in the milk flask.
If the temperature is above 50°F (10°C), refrigerate the milk.
The milk/milk froth is dispensed erratically by the coffee machine (sprays, splutters) (CVA 6xxx built-in appliance).
Check the temperature of the milk in the milk flask.
If the temperature is above 50°F (10°C), refrigerate the milk.
Push in the milk flask to the limit stop.
Cleaning the glass milk flask:

Remove and empty the milk flask.
Clean the milk flask holder on the coffee machine with a damp cloth.
Both the lid and the glass flask can be cleaned in the dishwasher, or by hand using a mild solution of warm water and liquid dish soap.
Rinse the milk pipework in the lid under running water and then place the milk flask lid in the dishwasher.
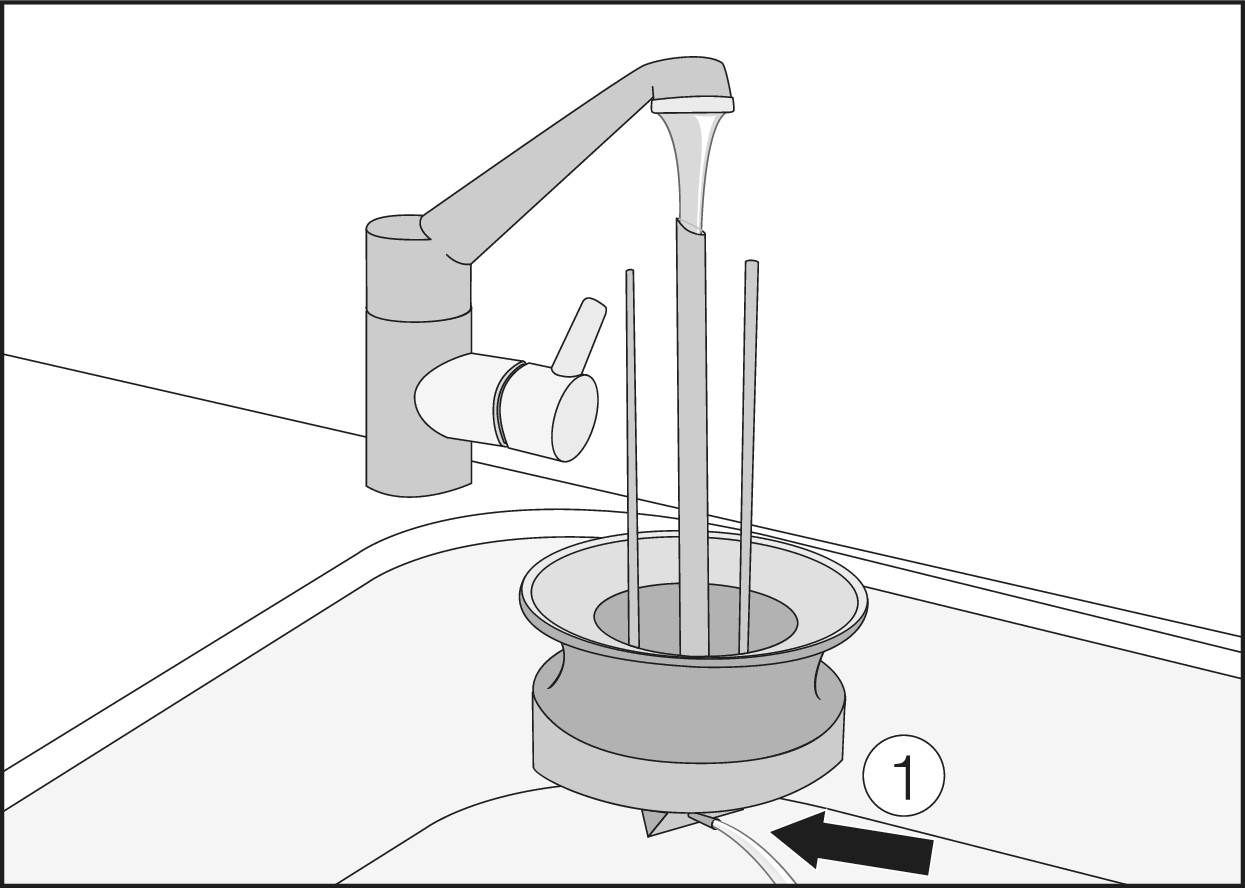
If no water flows out of the milk pipework (1), dismantle the milk flask lid and clean the lid with the cleaning brush supplied:
Pull the milk intake tube (1) out of the milk flask lid. Ensure that you also remove seal (2) when doing this.
Also use the cleaning brush to clean the milk pipework in the lid from the top and bottom.
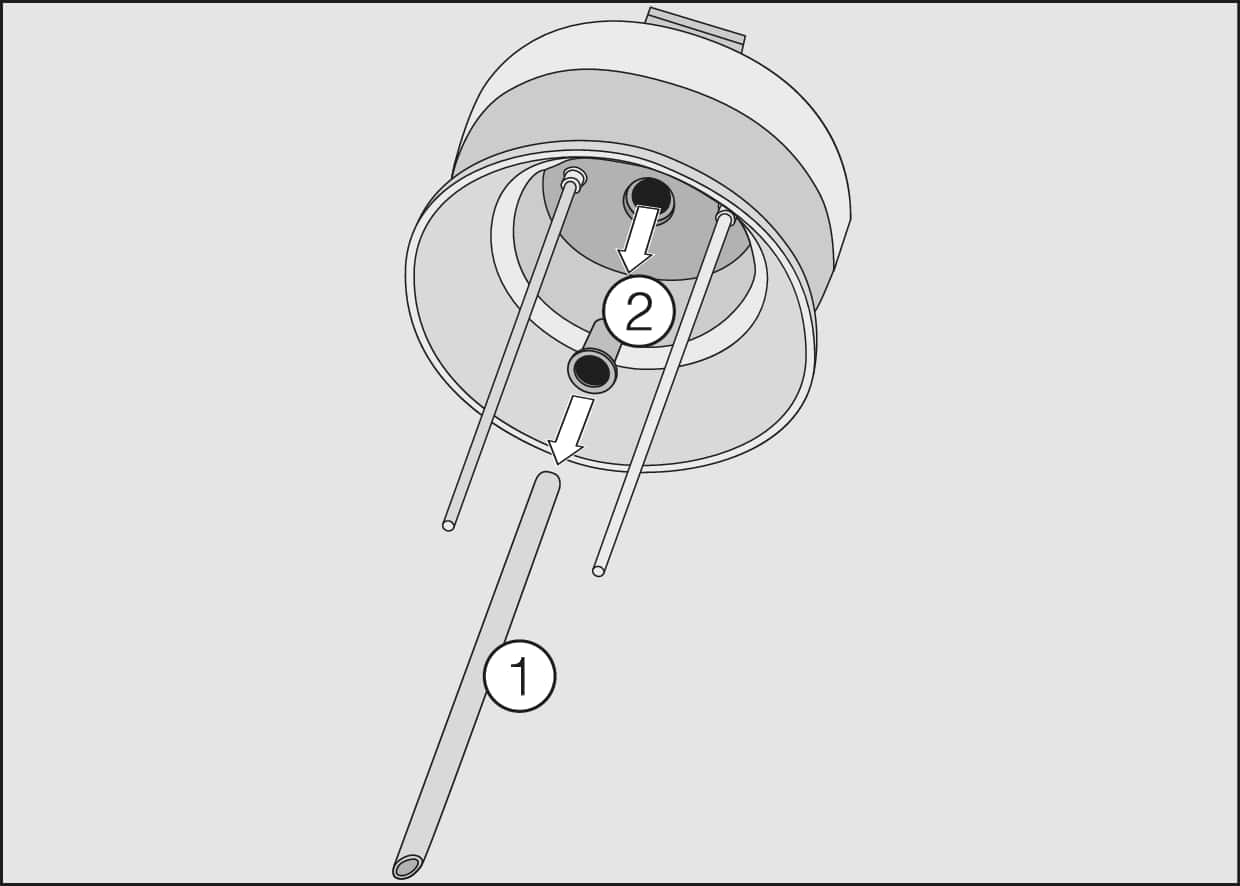
When assembling the milk flask: First insert the seal into the lid.
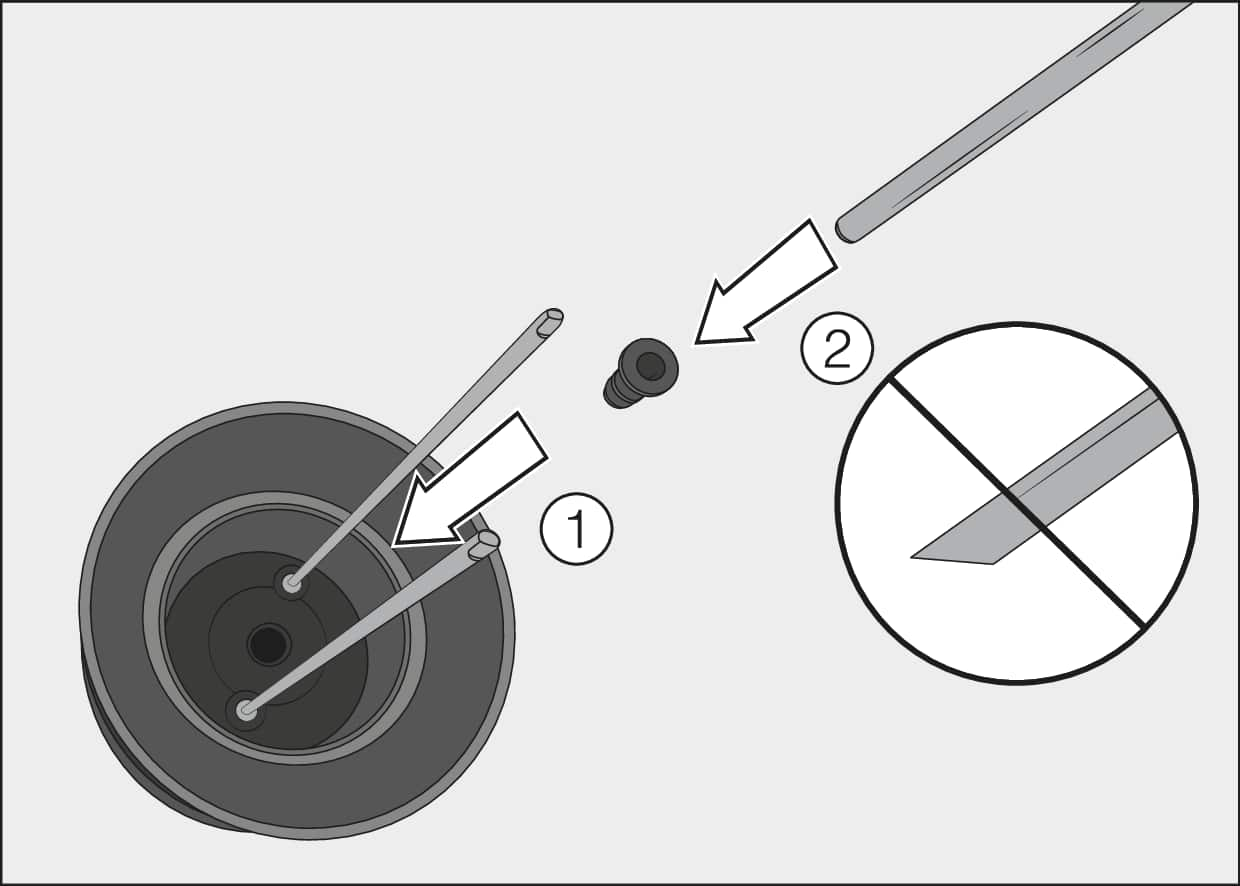
Insert the straight end of the milk intake tube into the seal.
Clean the glass flask.
Dry all parts and especially the threads on the lid and on the glass with a clean cloth.
Check whether the central spout is correctly assembled.
Clean the central spout at least once a week as follows:
Bring the central spout into its maintenance position:
Touch Main menu or .
Select Maintenance and then Clean the central spout.
Follow the instructions on the display.
The central spout will move into the maintenance position (1).
Pull the stainless steel cover off (2).

Push the retainer up slightly (1). Grip the dispensing unit by the sides and pull it forward to remove it (2).

Release the spout by holding the center of the spout with your index finger and thumb, and pulling it forward.
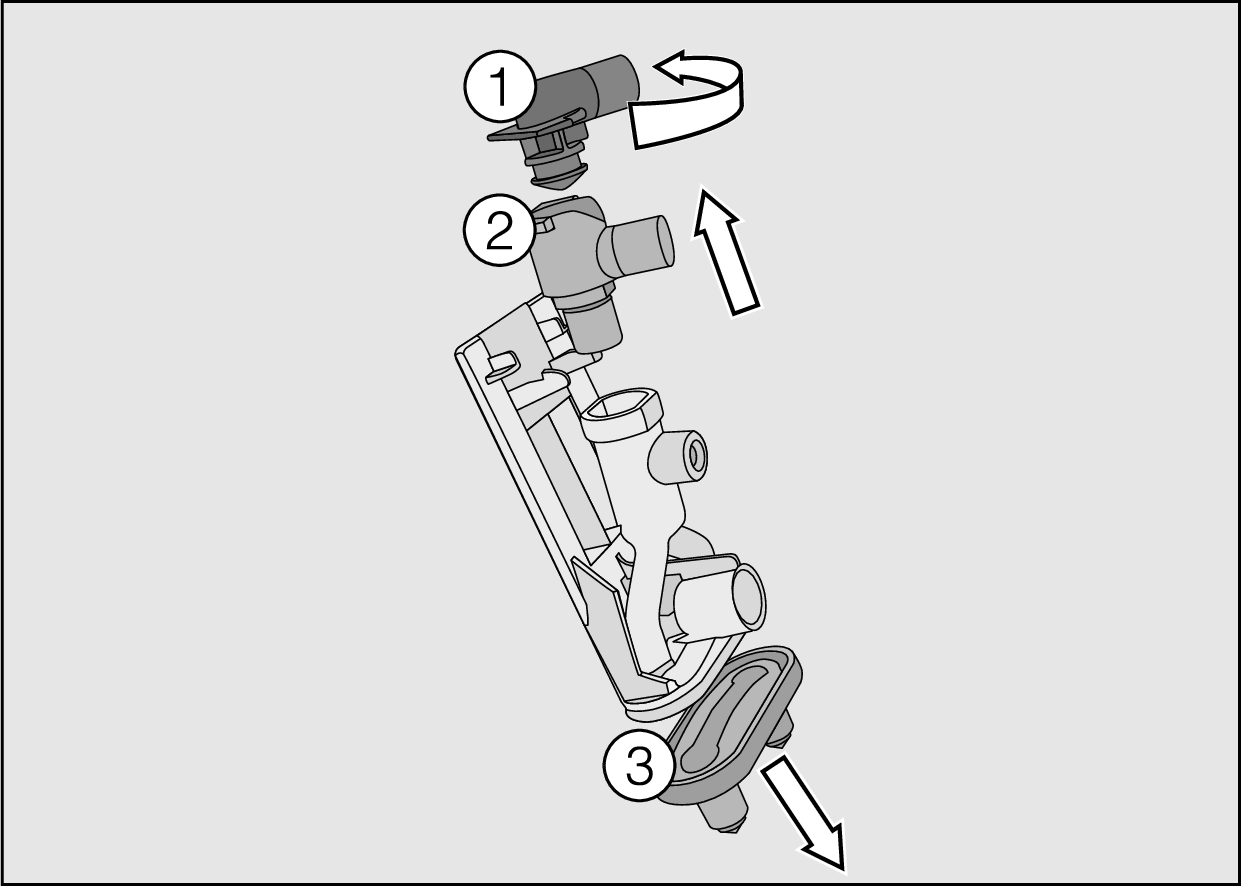
Turn the upper connecting piece (1) and pull it upward to remove it.
Remove the lower connecting piece (2) in the same way.
Pull off the spout (3).
Clean all parts (except the stainless steel cover for the central spout) in the dishwasher.
Then reassemble the dispensing unit in the opposite order.

Ensure that the top dispensing piece (1) snaps into place with an audible click.
Push the spouts (2) firmly back onto the dispensing unit.
Reinsert the dispensing unit into the central spout and touch OK.
Then reattach the stainless steel cover and touch OK.
The central spout will now be rinsed through.
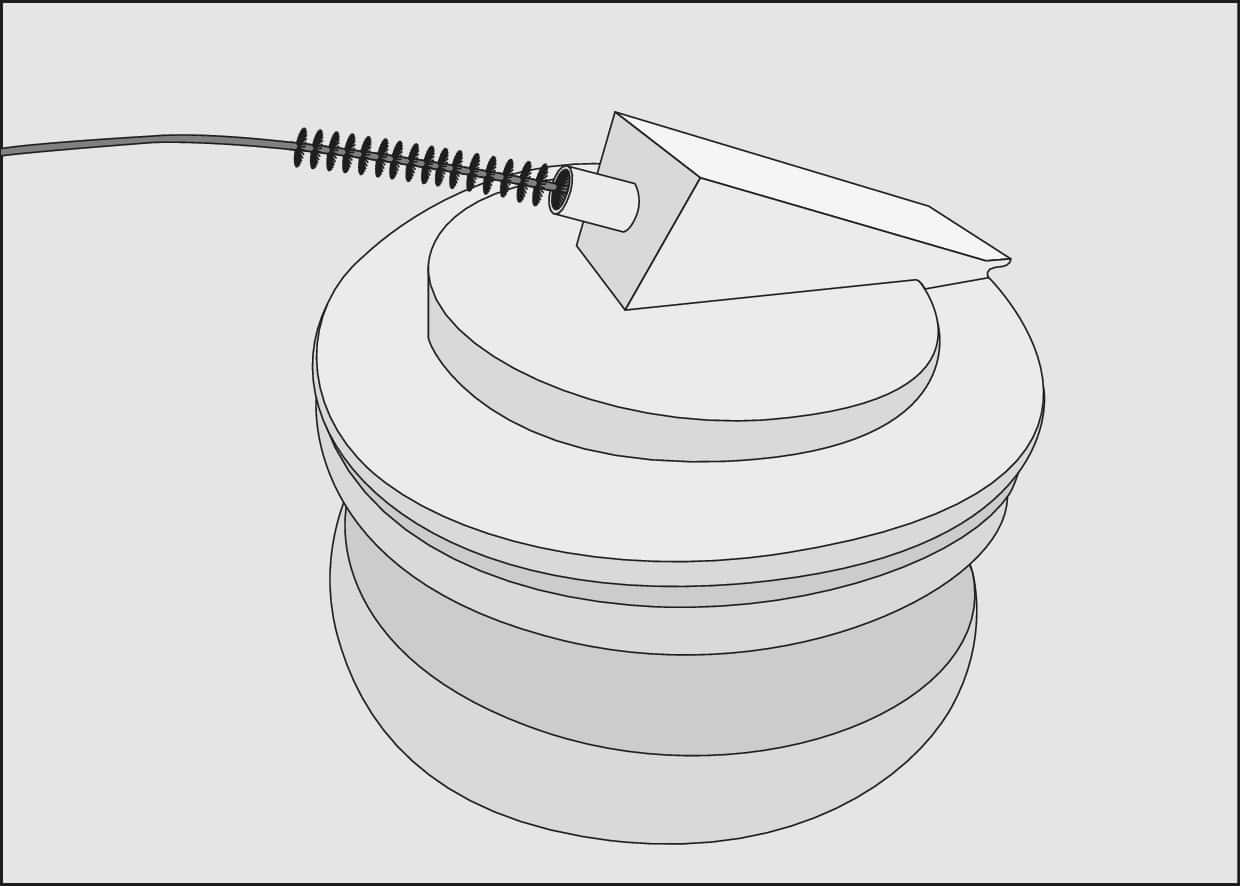
Replace the blocked elbow connector with the elbow connector supplied. Proceed as follows:
Open the coffee machine door.
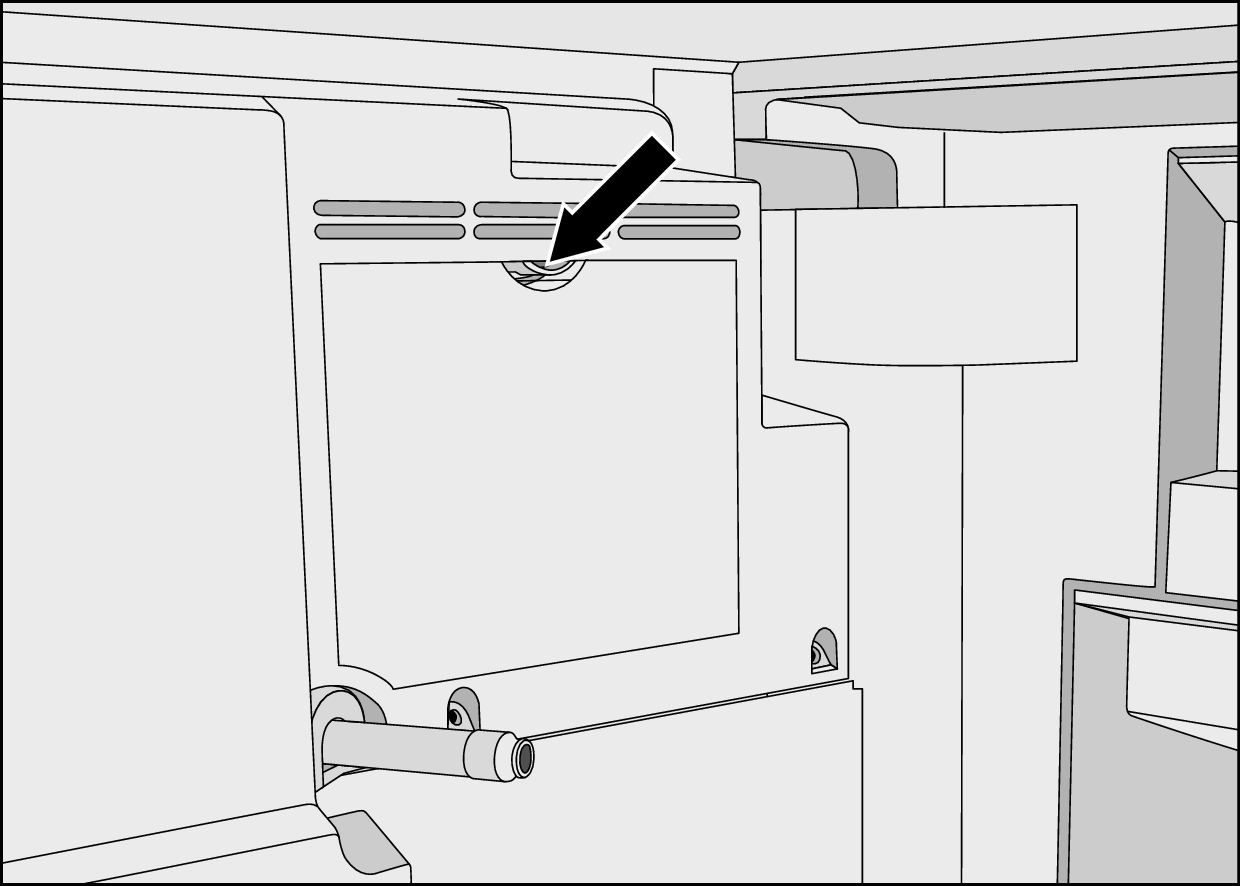
Open the service flap on the back of the appliance door.
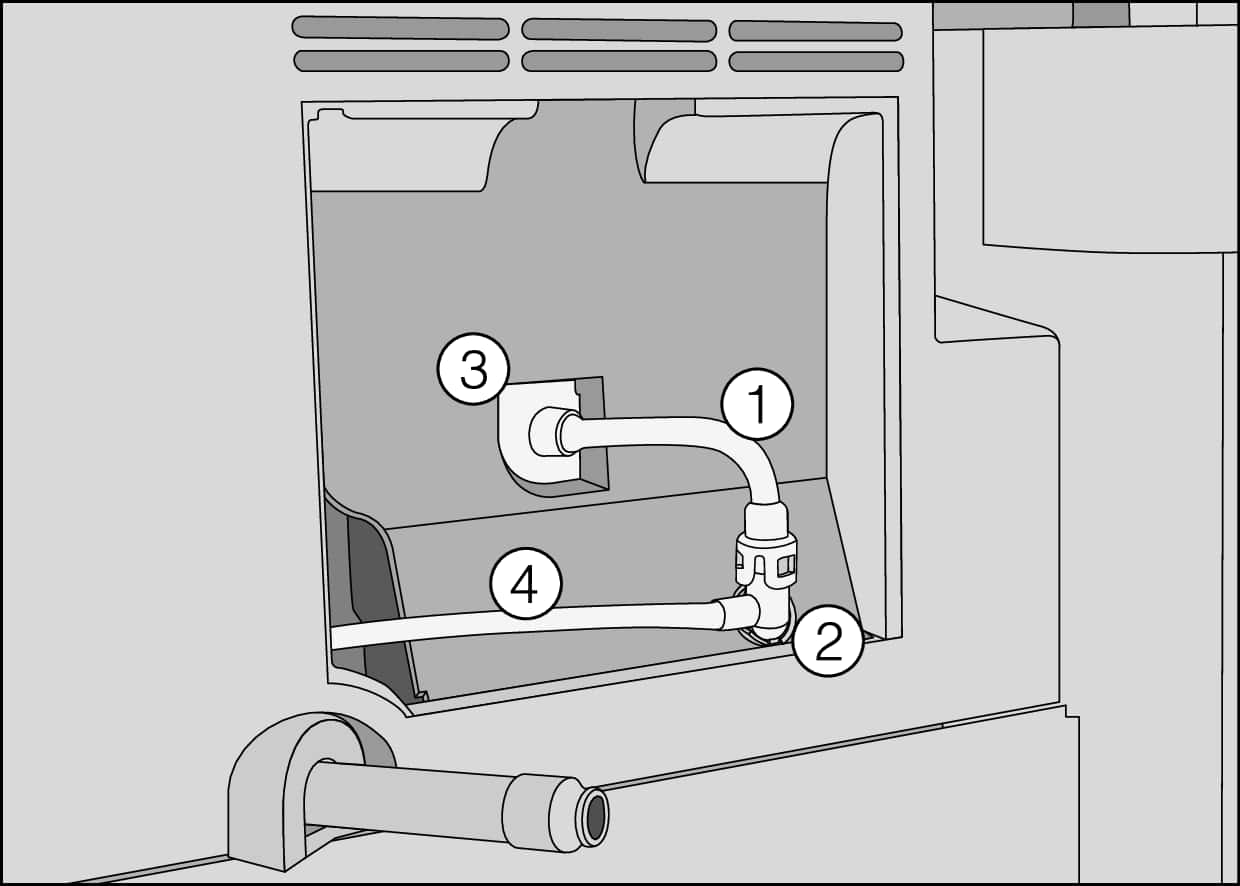
First remove the air intake hose (1) from the opening (3). Then pull off the elbow connector (2).
Pull both hoses off the elbow connector.
Clean the air intake hose (1) under running water using the cleaning brush supplied. Blowing through the hose can also loosen any blockages.
Insert the brush into the milk pipework (4). Move the cleaning brush forward and backward as far as possible until all milk residue has been removed.
Now take the new elbow connector. (You can dispose of the used elbow connector in your household waste.)
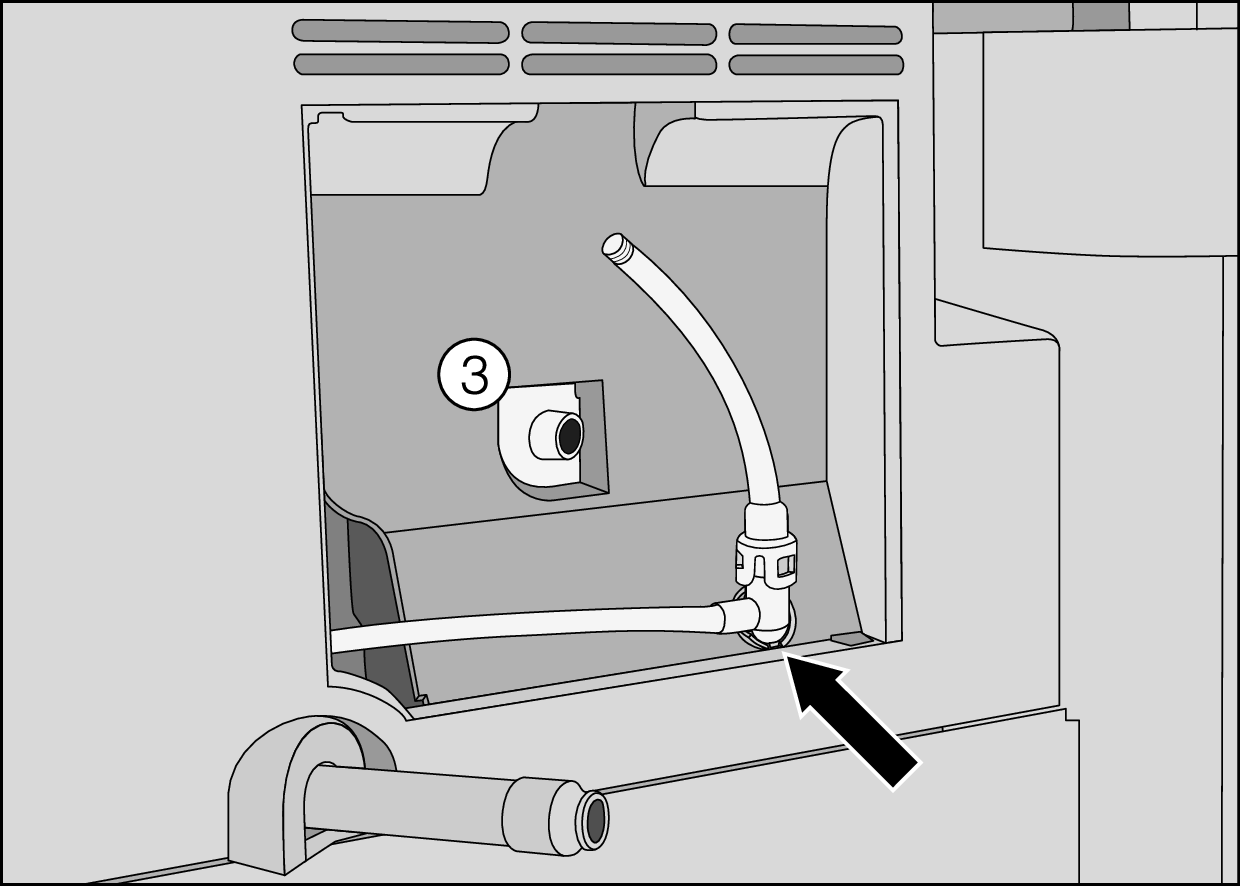
Push the hoses onto the elbow connector and reinsert it. Make sure that the bar on the elbow connector is pointing downward. The hoses should sit tightly on the connection pieces and form a seal.
Reinsert the air intake hose into the opening (3).
Reinsert the service flap.
Close the coffee machine door.
If the fault persists, please contact Miele Service or book a repair appointment online.


