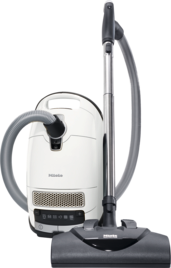
The cleaning performance of the vacuum cleaner is reduced (Boost CX1).
The airways are blocked.
Something bulky has been vacuumed up (e.g., large leaves from house plants) and is blocking the airways. The casing gets very hot as air is unable to escape as required.
Disassemble the floorhead, hose, handle, and telescopic wand.
You can carefully push coarse particles which are jammed in the hose or in the telescopic wand toward the floorhead using a long object (e.g., a broom handle).
Items causing a blockage are usually easy to shake out of the handle.
The air intake ducting inside the vacuum cleaner is blocked.
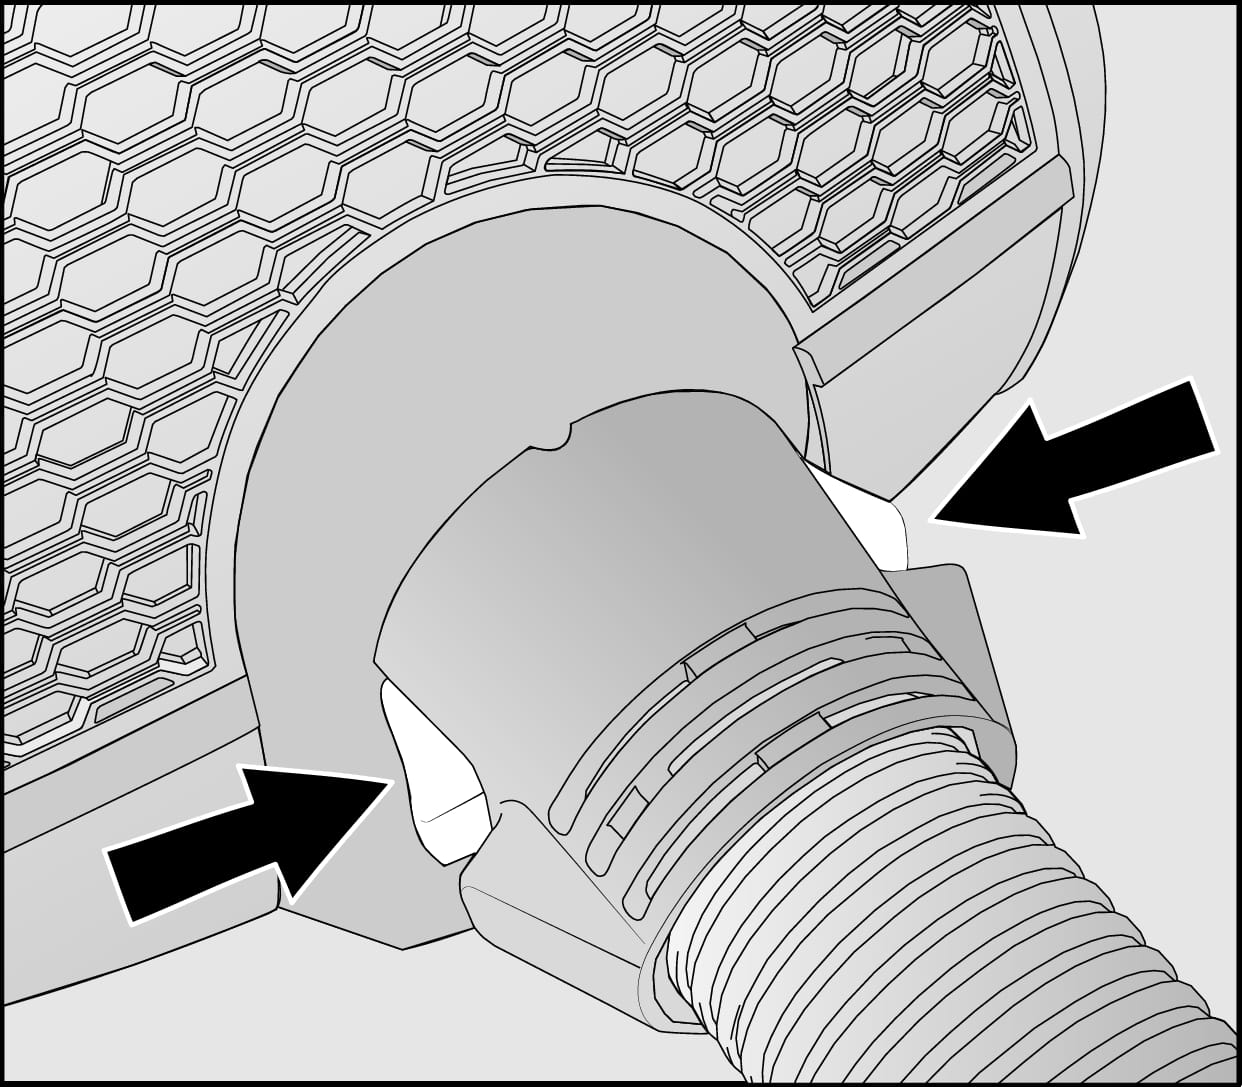
Press the release buttons at the side of the hose connector and pull the suction hose out of the suction opening.
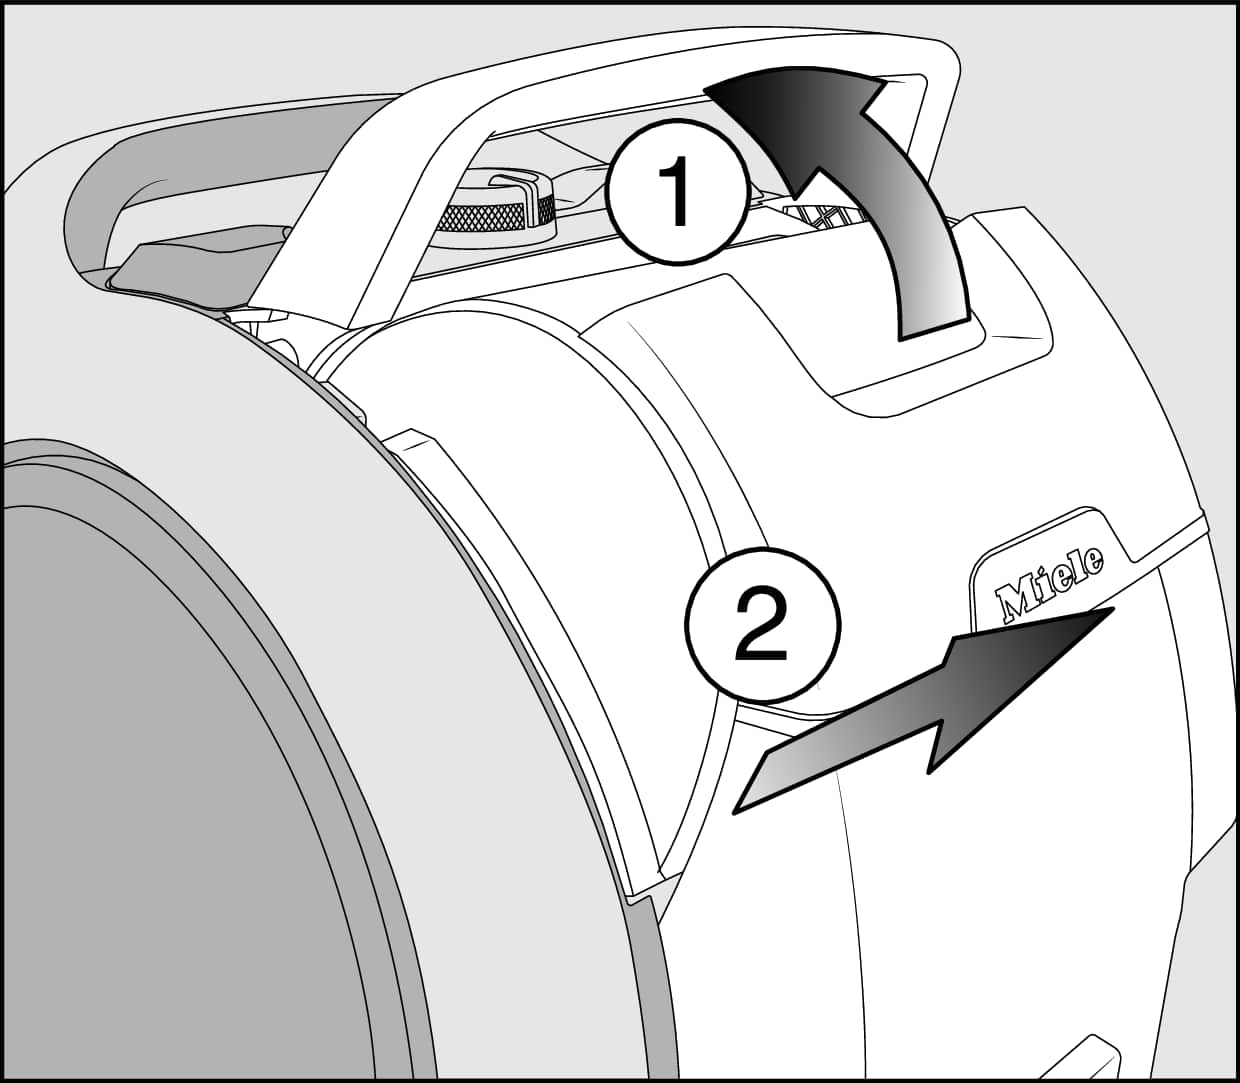
Unlatch the dust container by lifting the handle upward (1).
Remove the dust container (2).
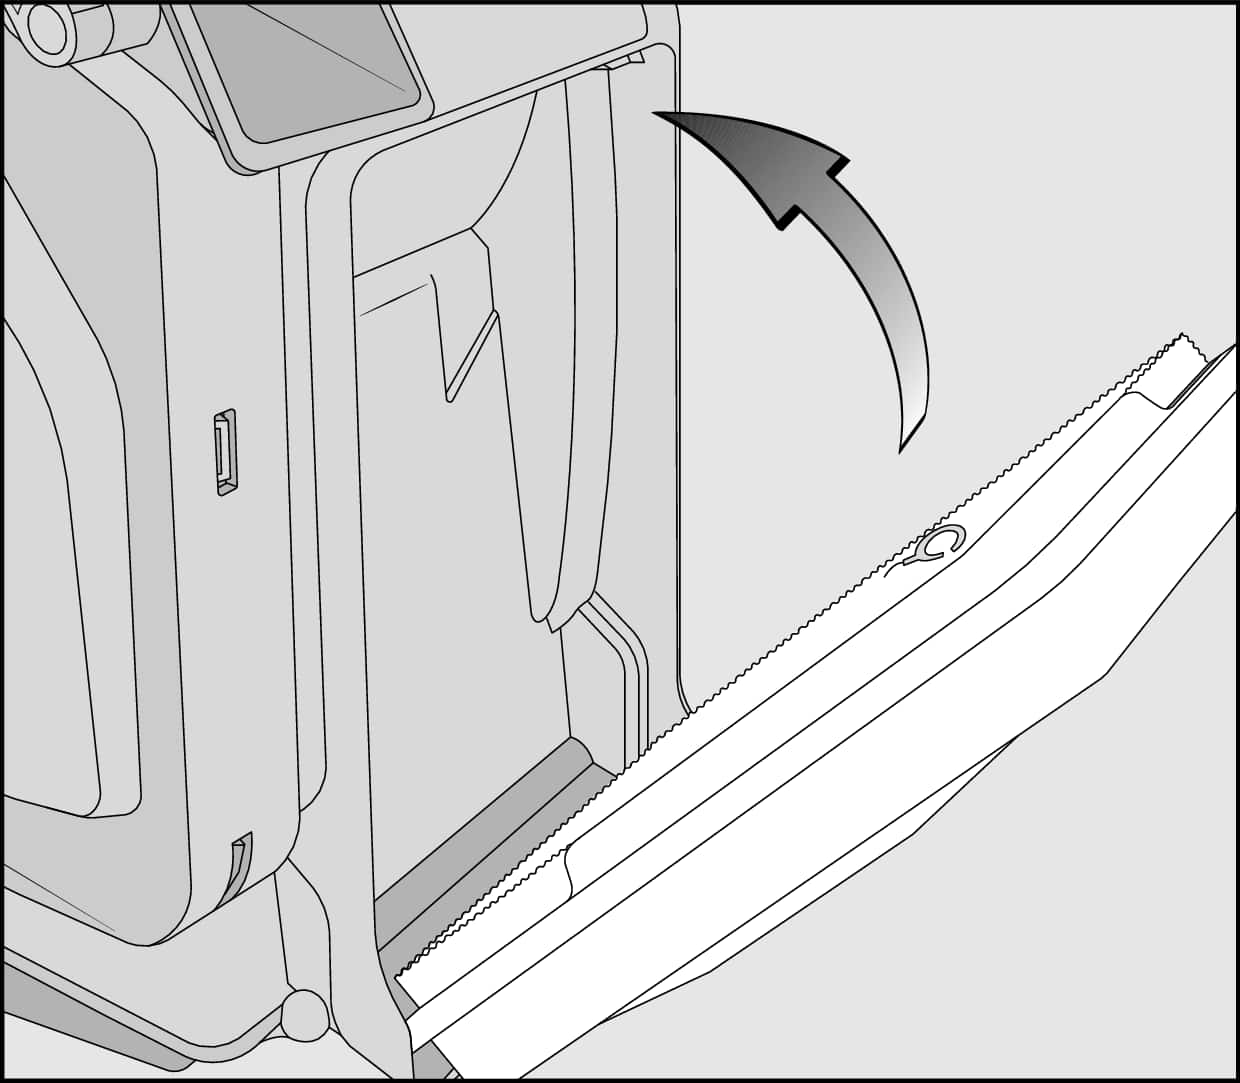
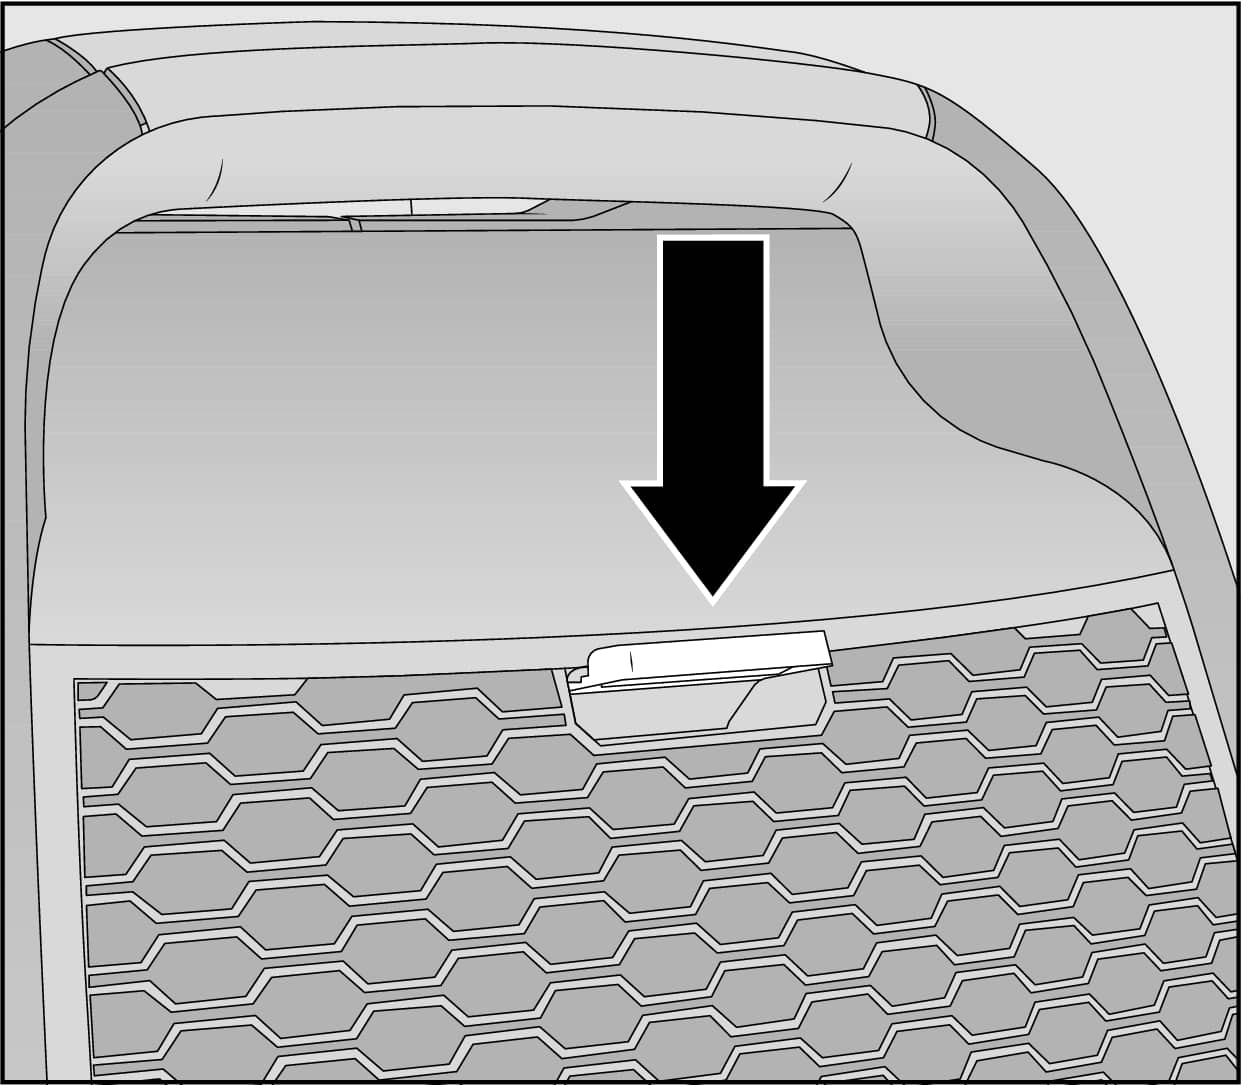
The air intake ducting is now visible at the top of the vacuum cleaner.
To clear the blockage in the air intake ducting, use an object to push the large, jammed pieces down toward the suction hose.
The dust container is full and/or the filters are dirty.
The suction power decreases when the dust container is full or the fine dust filter, filter mat, filter frame, and the prefilter are dirty and/or the exhaust filter is clogged.
Clean the fine dust filter, filter mat, filter frame, and the prefilter as required, but at the latest when you notice a reduction in the suction power.
Clean the fine dust filter and the filter mat once a month, allowing a drying time of 24 hours.
Switch the vacuum cleaner off using the On/Off footswitch.
Remove the electrical plug from the socket.
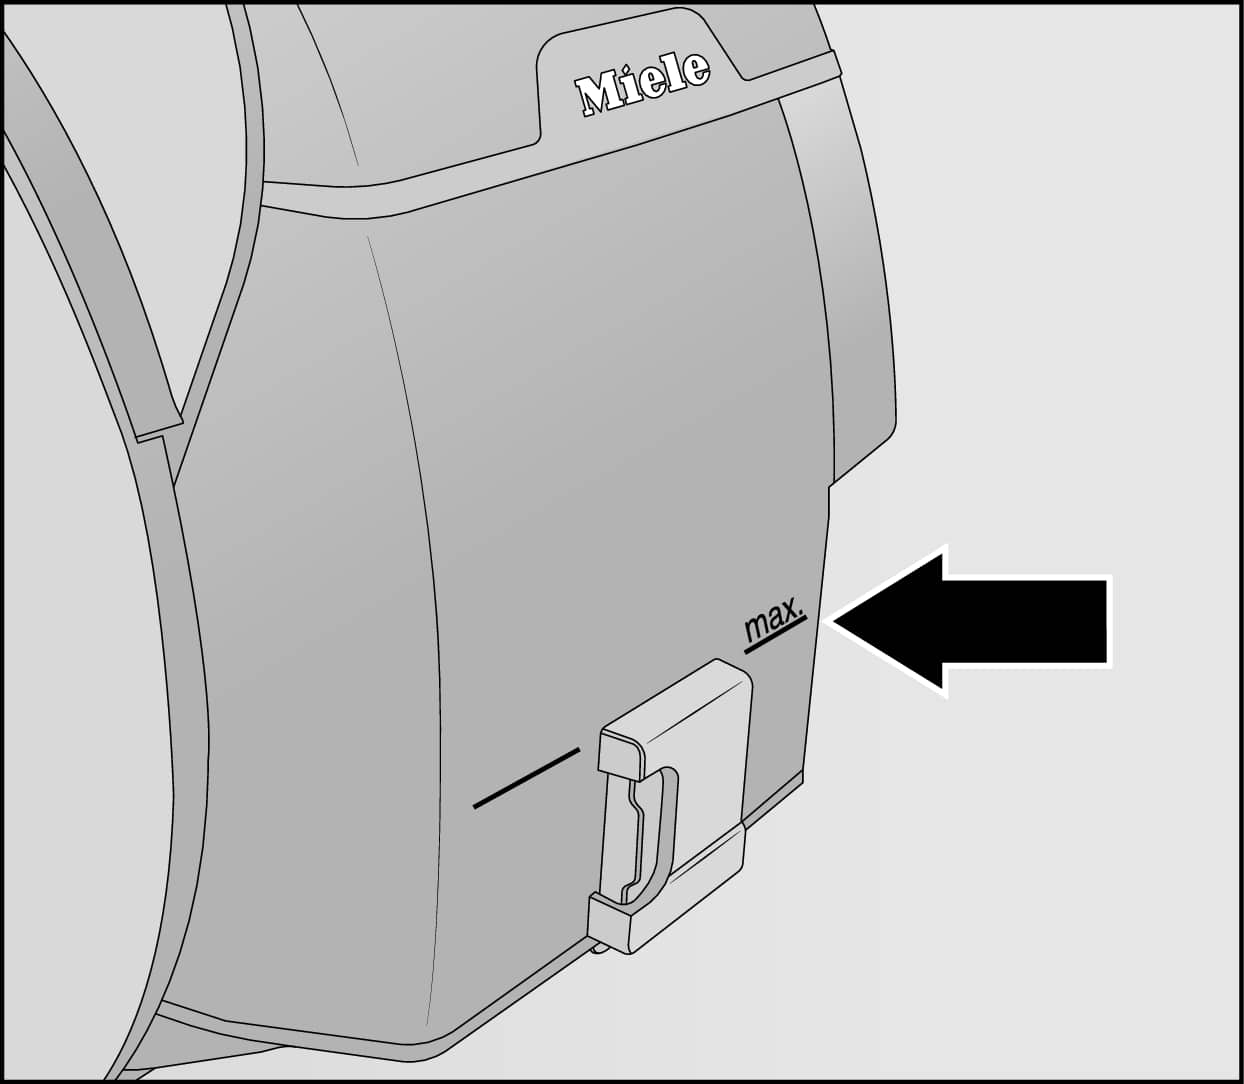
Empty the dust container before the dust has reached the max. marking on the dust container.
Empty and clean the dust container:
Unlatch the dust container by lifting the handle upward (1).
Remove the dust container (2).
The contents of the dust container can be disposed of with normal household waste, providing it contains general household dust only.
Hold the dust container close to the trash can so that as little dust billows out as possible.
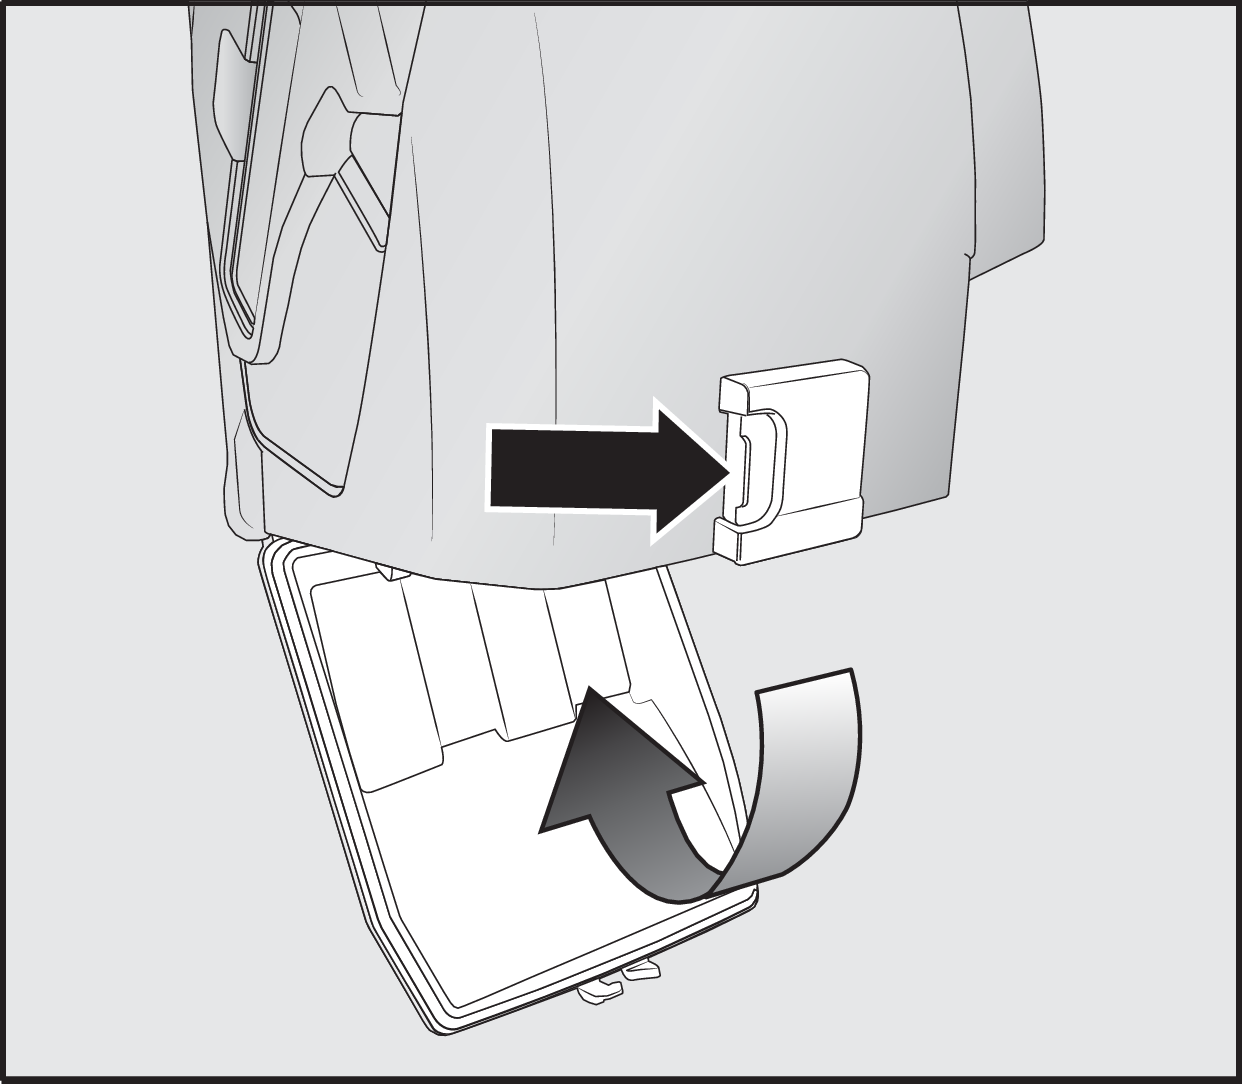
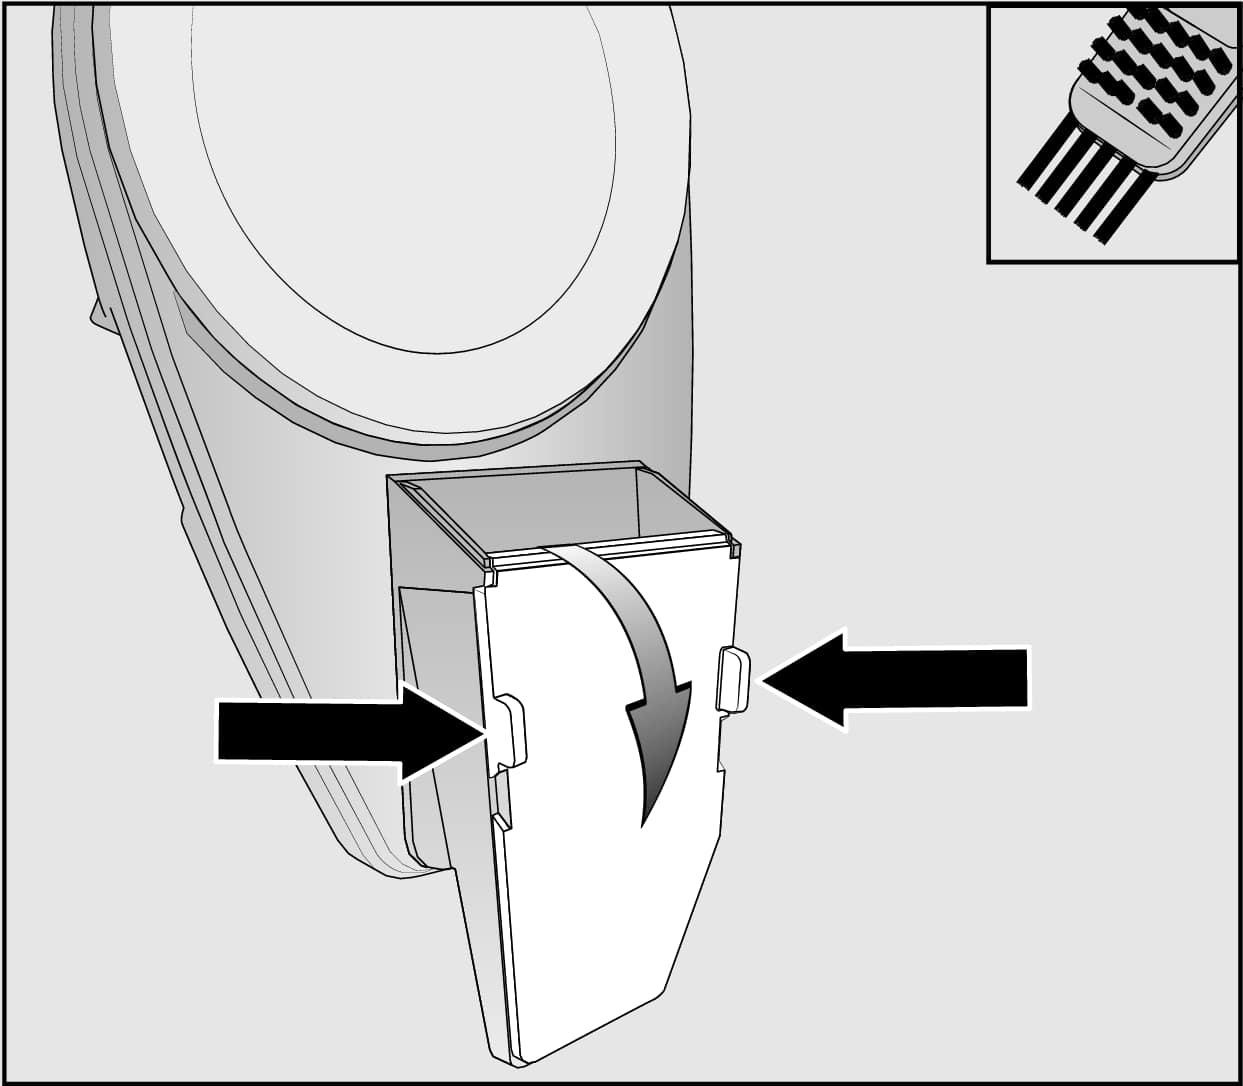
Press the release button on the bottom of the dust container.
The flap will open and the dust will fall out.
If you need to clean the dust container, use a slightly damp all-purpose cloth and mild liquid dish soap.
Dry the dust container carefully.
Close the flap firmly. It should click into place.
Clean the fine dust filter and the filter mat:
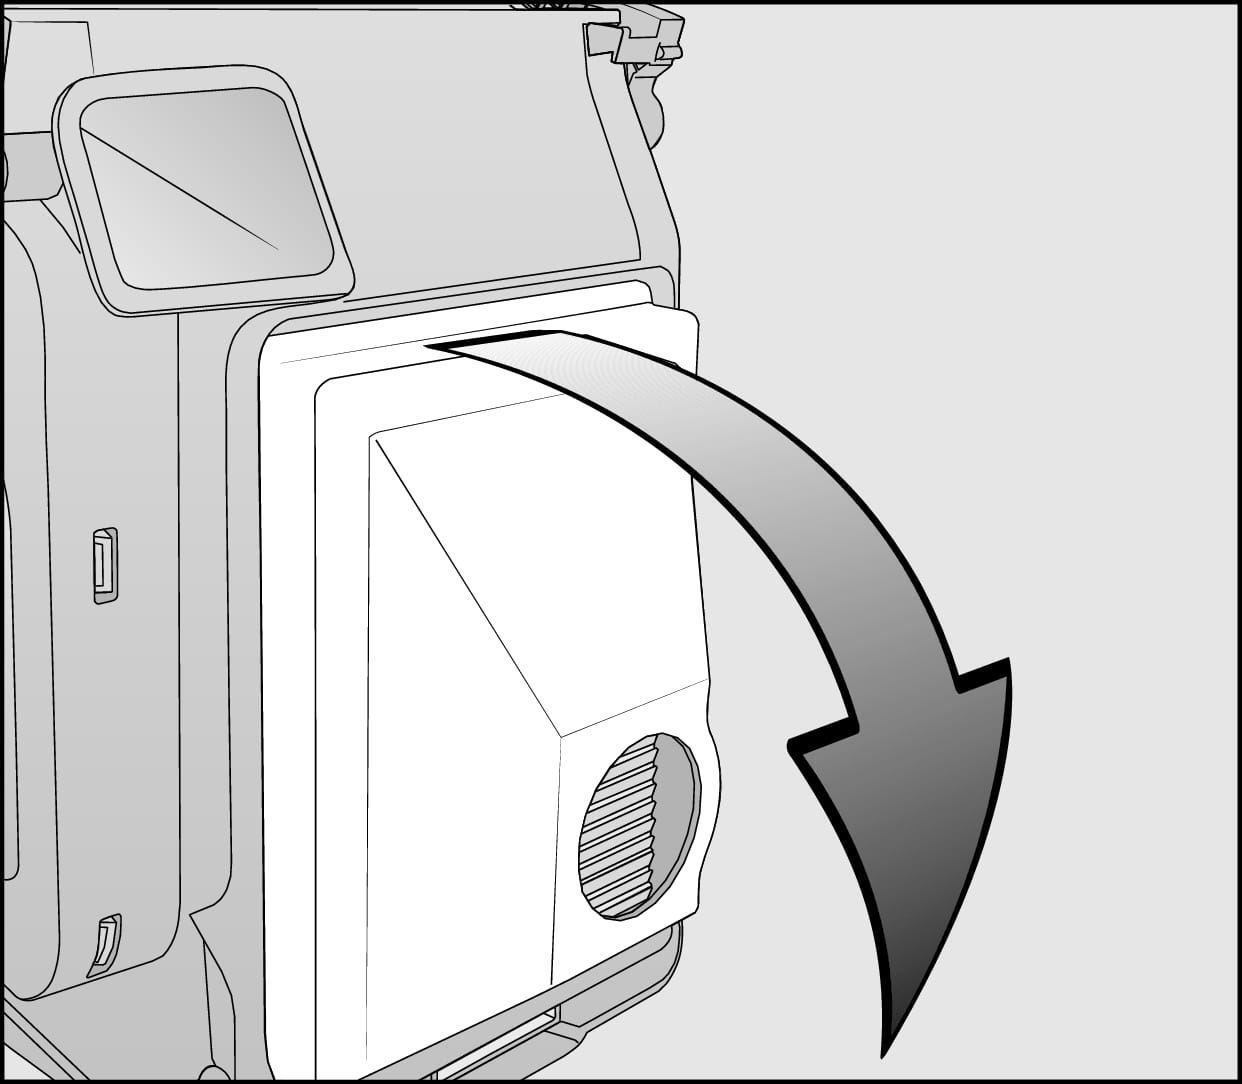
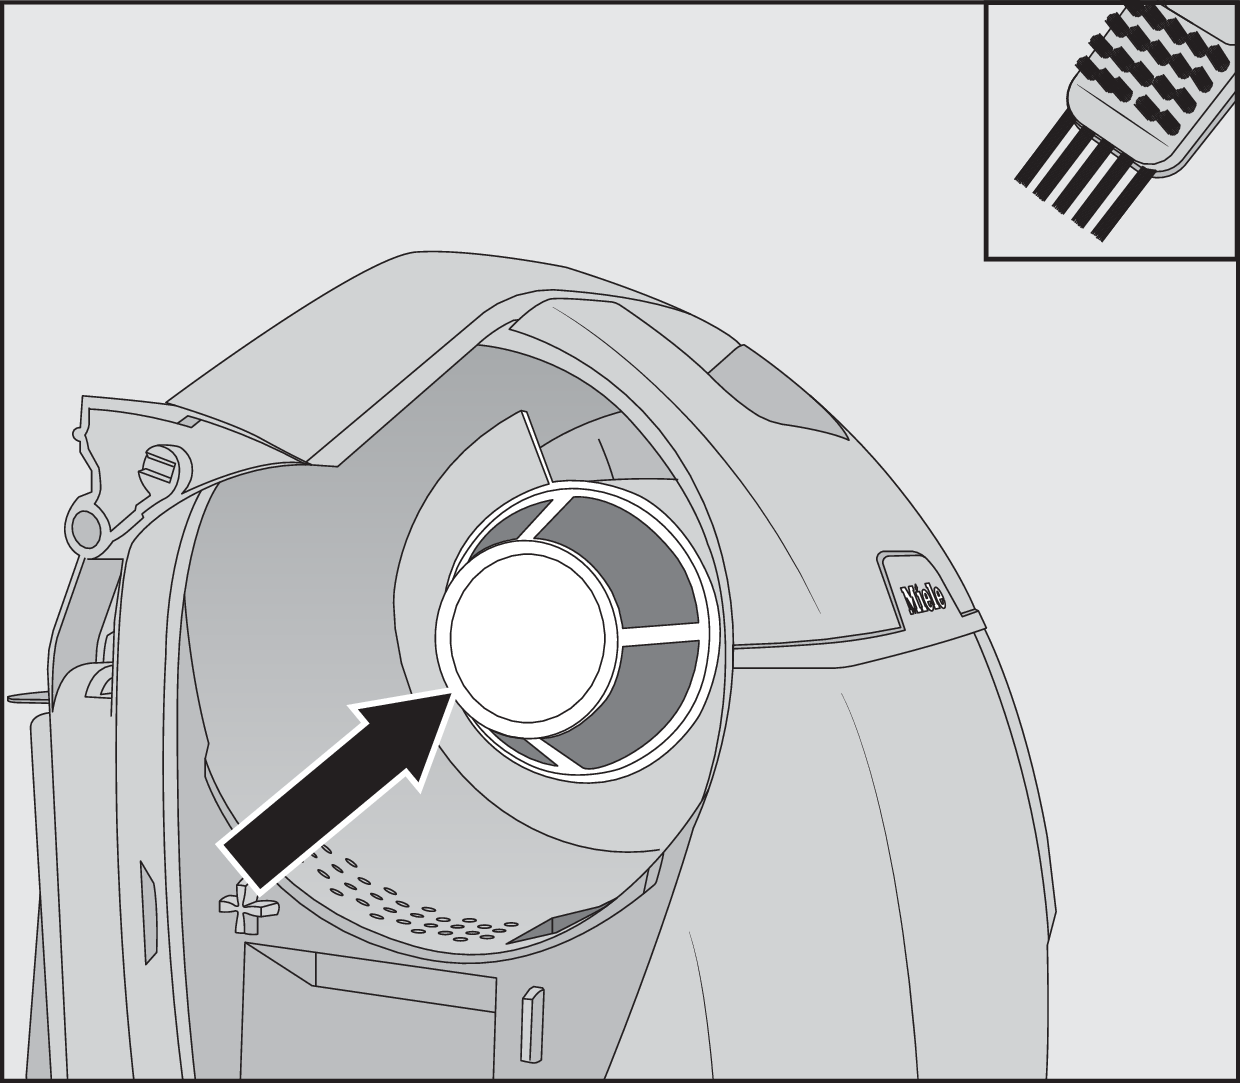
The fine dust filter is located on the rear side of the dust container. It is equipped with a filter mat.
Remove the fine dust filter in the direction of the arrow.
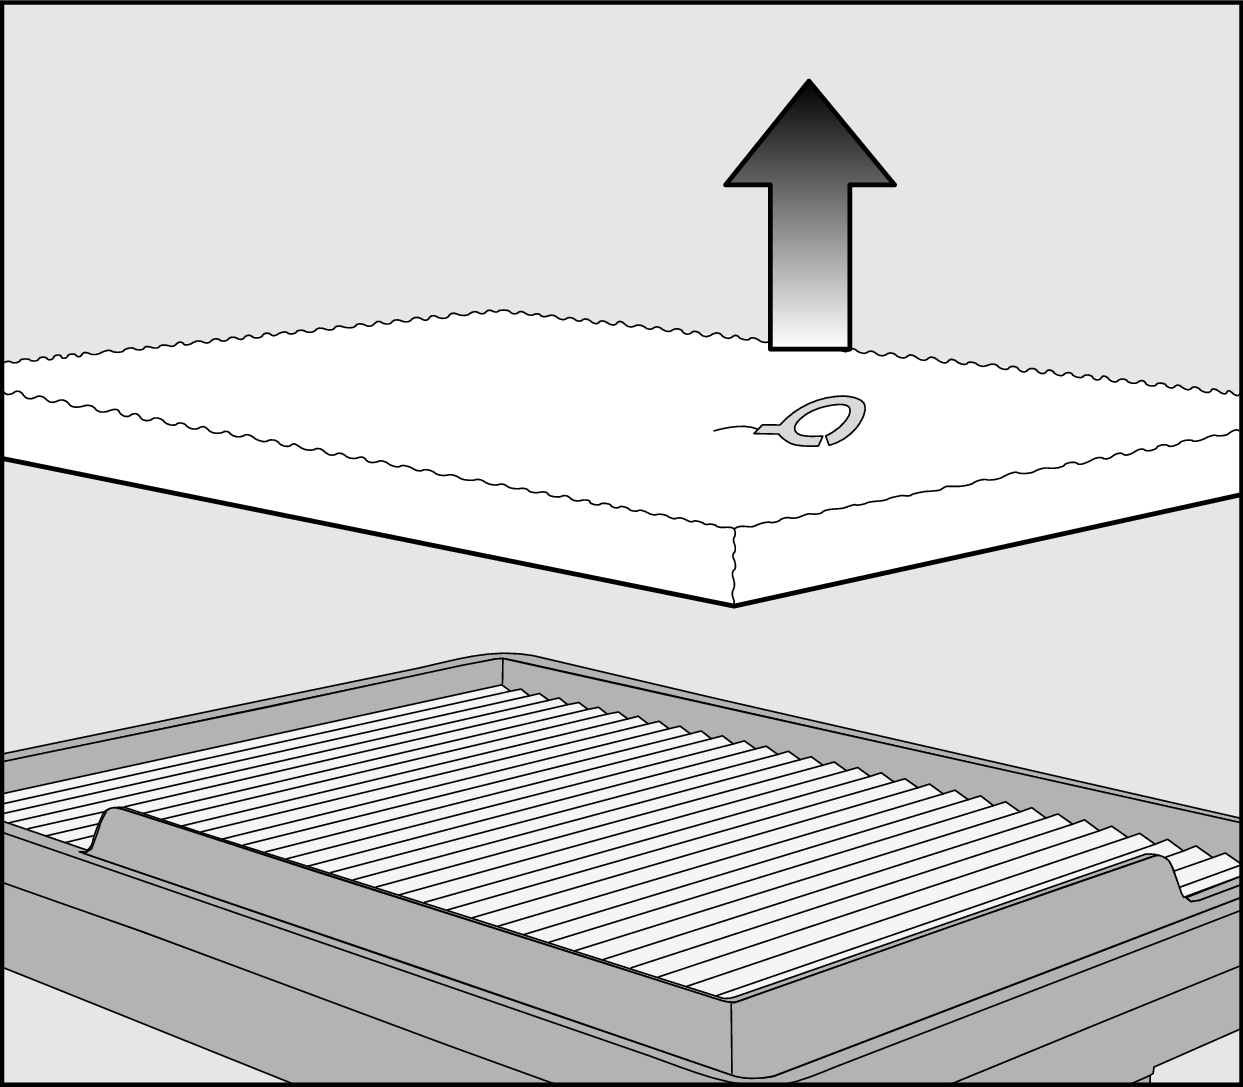
Remove the filter mat from the fine dust filter.
Carefully knock the dust out of both filters over a trash can.
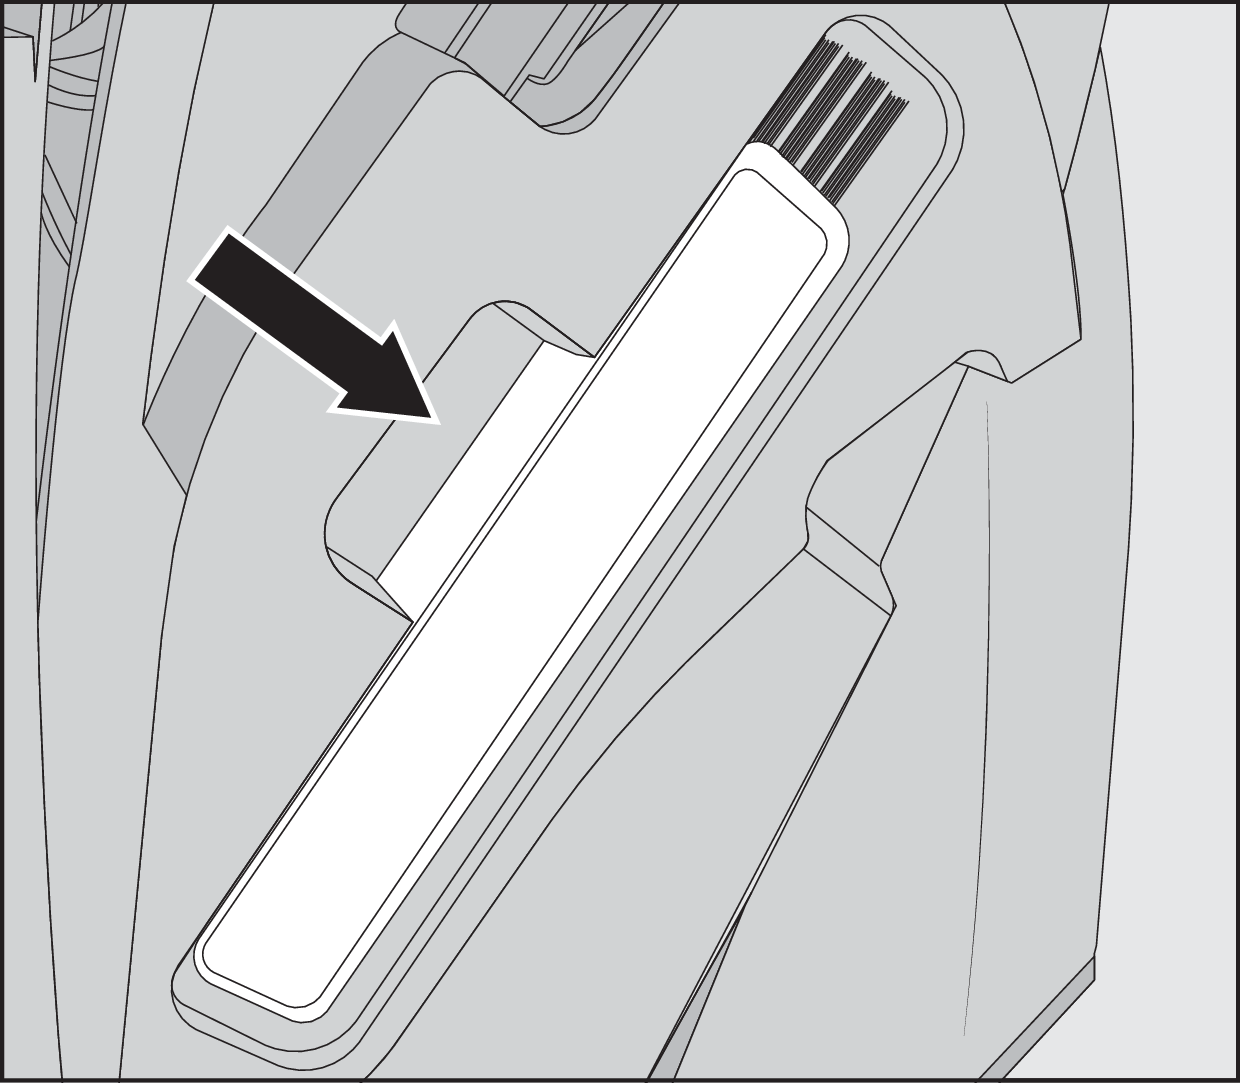
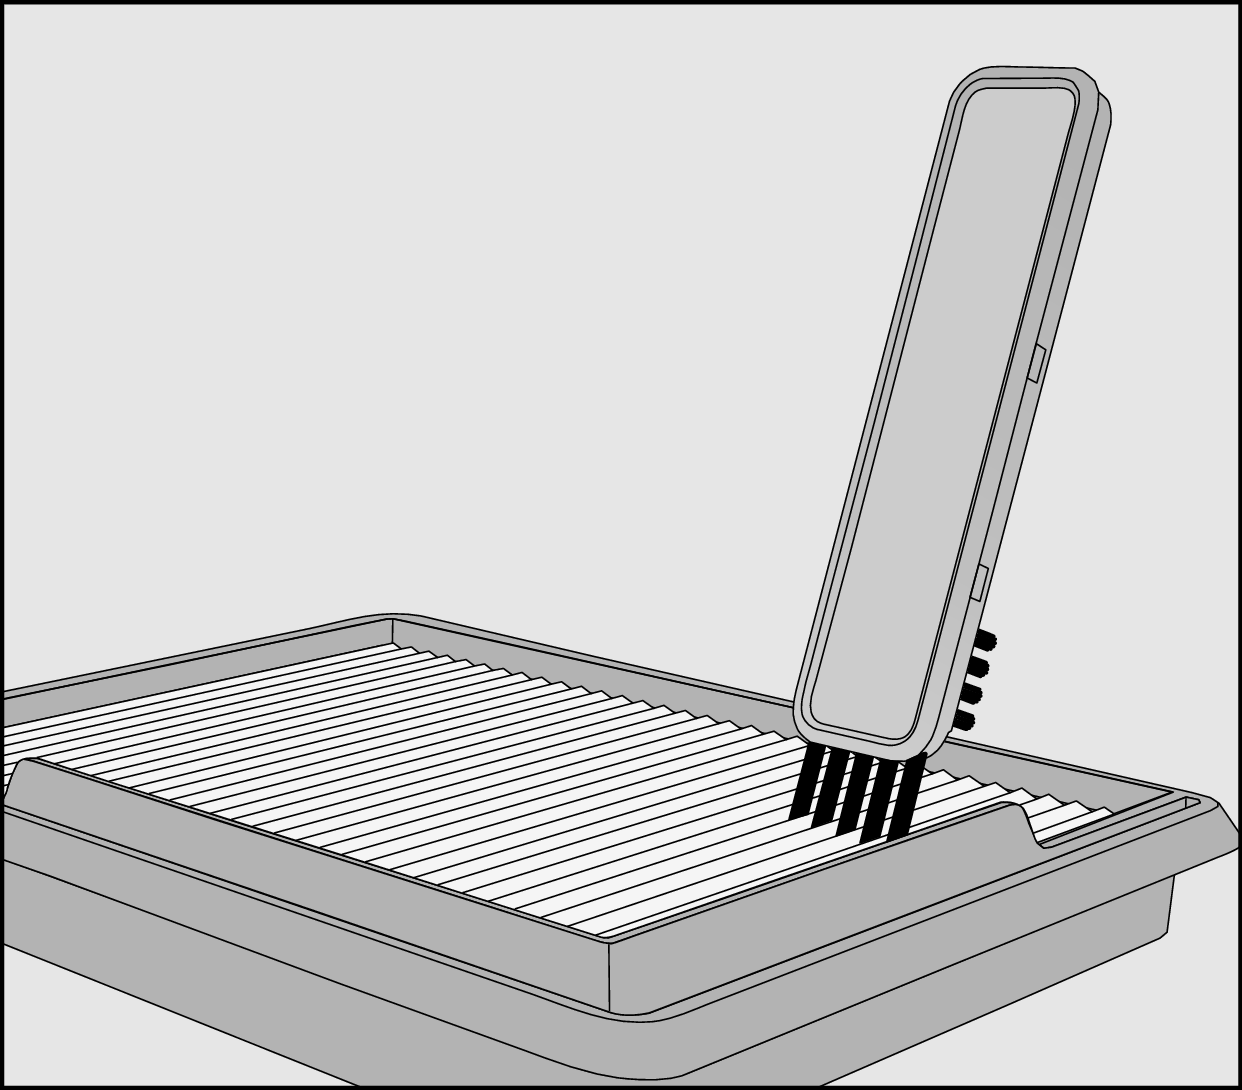
Take the cleaning tool out of the side flap on the dust container.
Clean the pleated side of the fine dust filter with the long brushes on the cleaning tool.
Risk of damage caused by incorrect cleaning.
The fine dust filter and the filter mat can become damaged. Both filters can lose their effect.
Do not use pointed or sharp-edged objects to clean the fine dust filter and the filter mat.
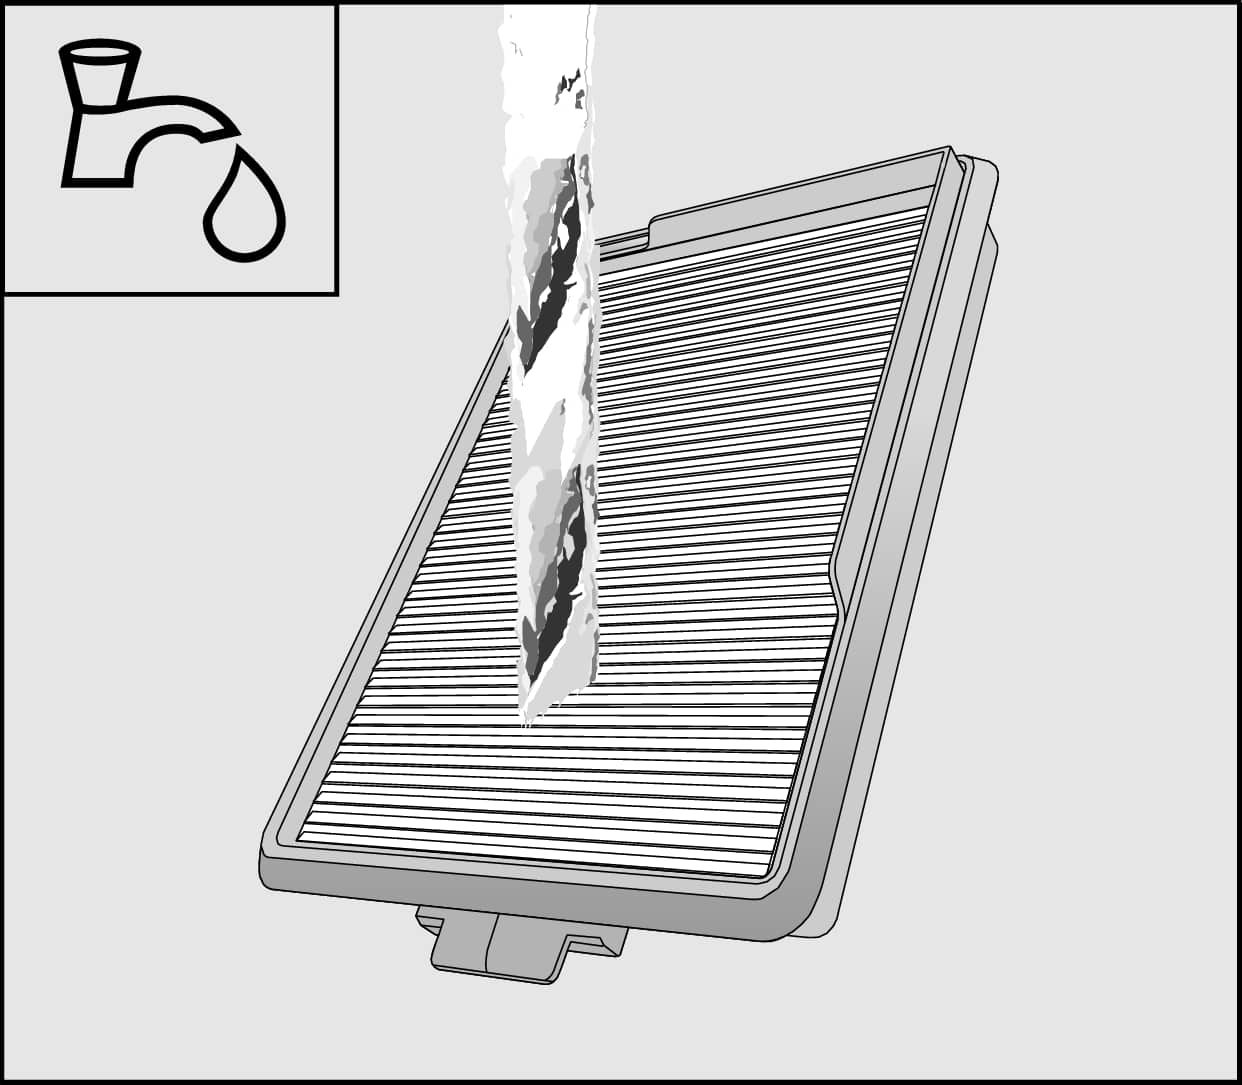
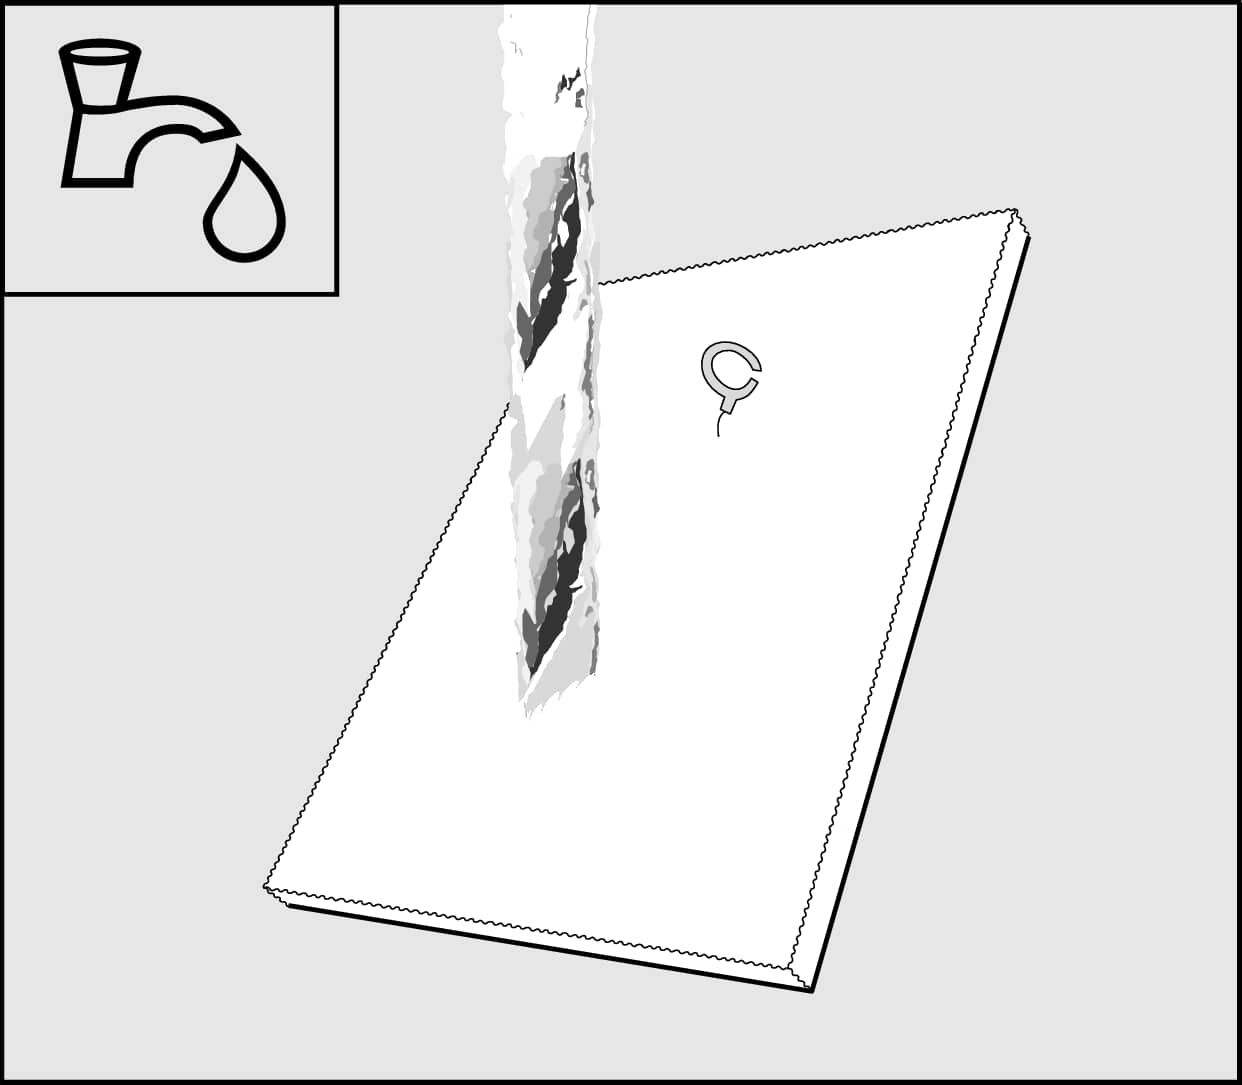
Do not use liquid dish soap or cleaning brushes when cleaning the pleated side of the fine dust filter and the filter mat with water.
After cleaning, allow the fine dust filter to dry for a minimum of 24 hours with the pleated side facing up. Choose a well-ventilated room.
After cleaning, also allow the filter mat to dry for a minimum of 24 hours.
Clean the fine dust filter and the filter mat once a month, allowing a drying time of 24 hours.
Rinse the pleated side of the fine dust filter under cold running water.
Clean the filter mat under cold running water.
Allow the fine dust filter and the filter mat to dry for a minimum of 24 hours.
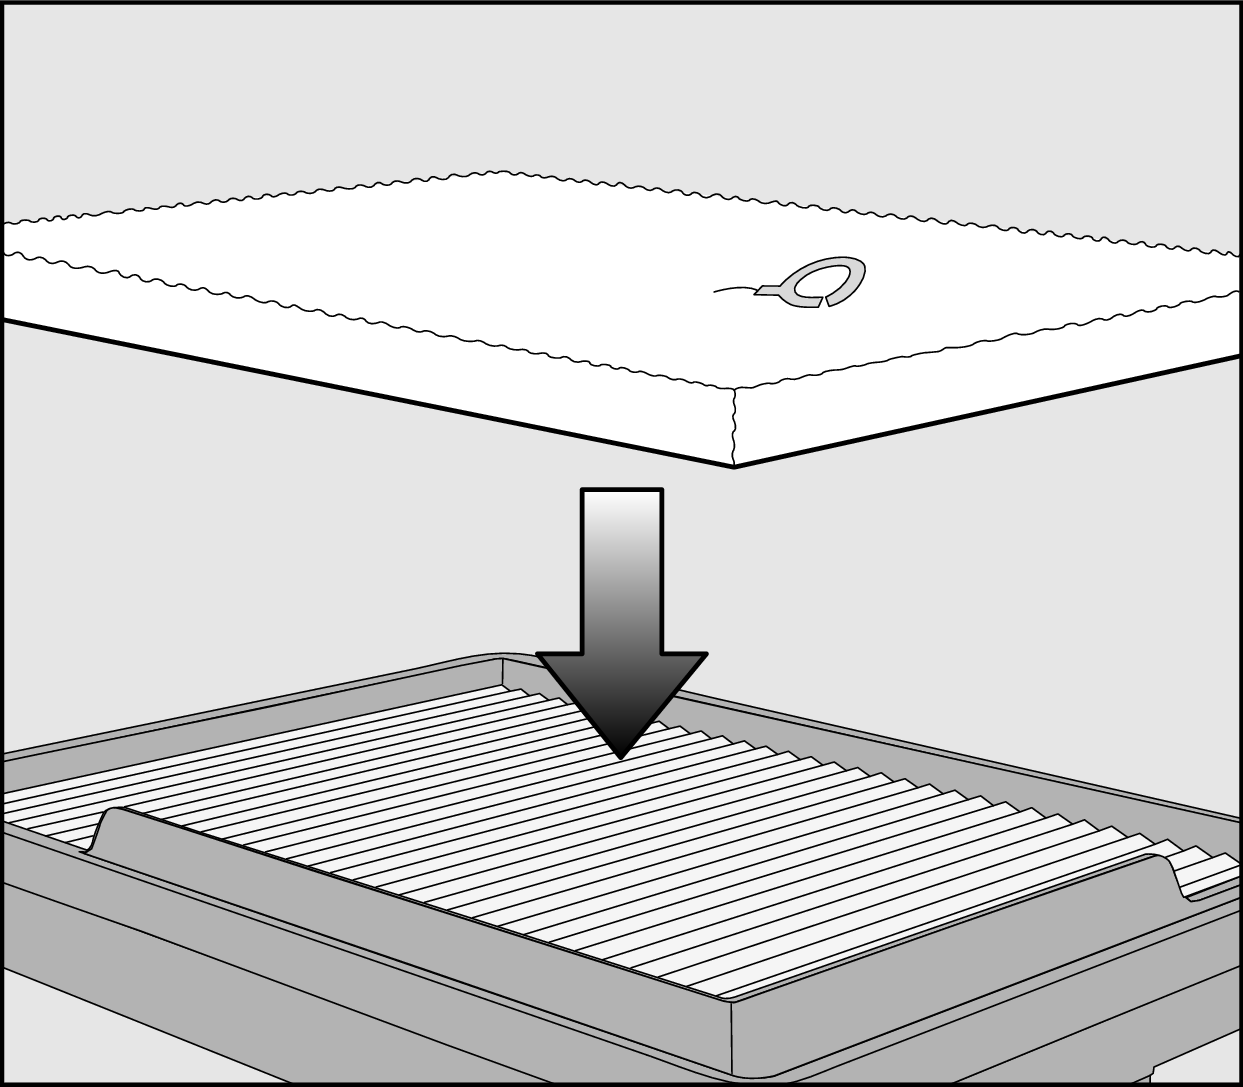
Attach the dry filter mat to the dry fine dust filter so that the soft side of the filter mat is pointing up and the loop used to remove it is visible.
Insert the fine dust filter carefully into the dust container.
Press the fine dust filter firmly into position.
To continue achieving the best possible cleaning performance with the vacuum cleaner, replace the CX FSF fine dust filter with a new one after approx. 3 years.
Clean the filter frame and the prefilter:
There is a removable filter frame on the rear side of the dust container side flap.
Behind the side flap is a prefilter.
Clean the filter frame and the prefilter if necessary.
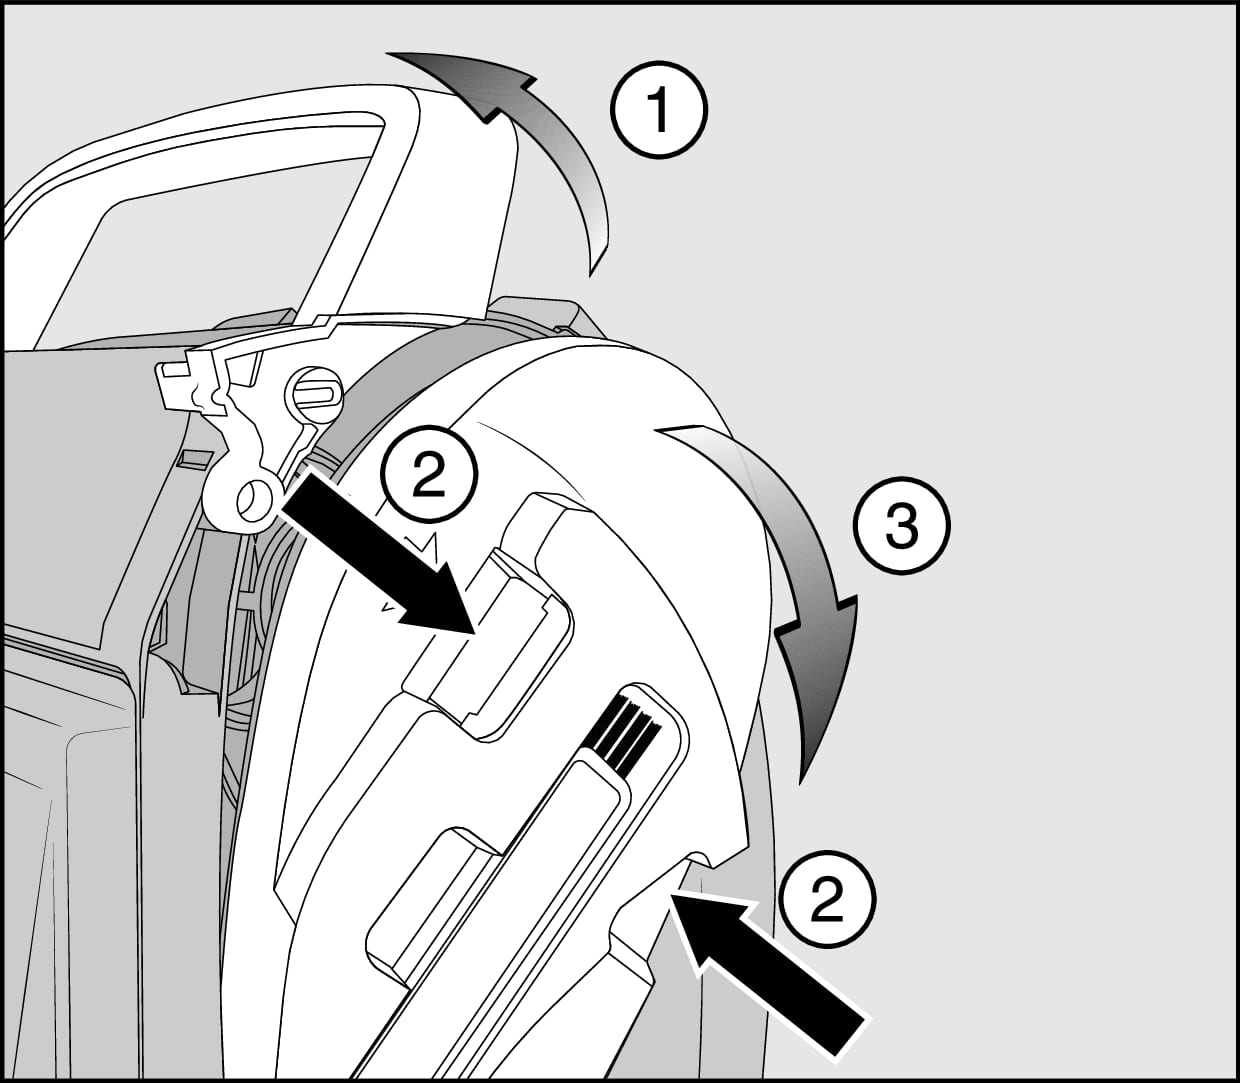
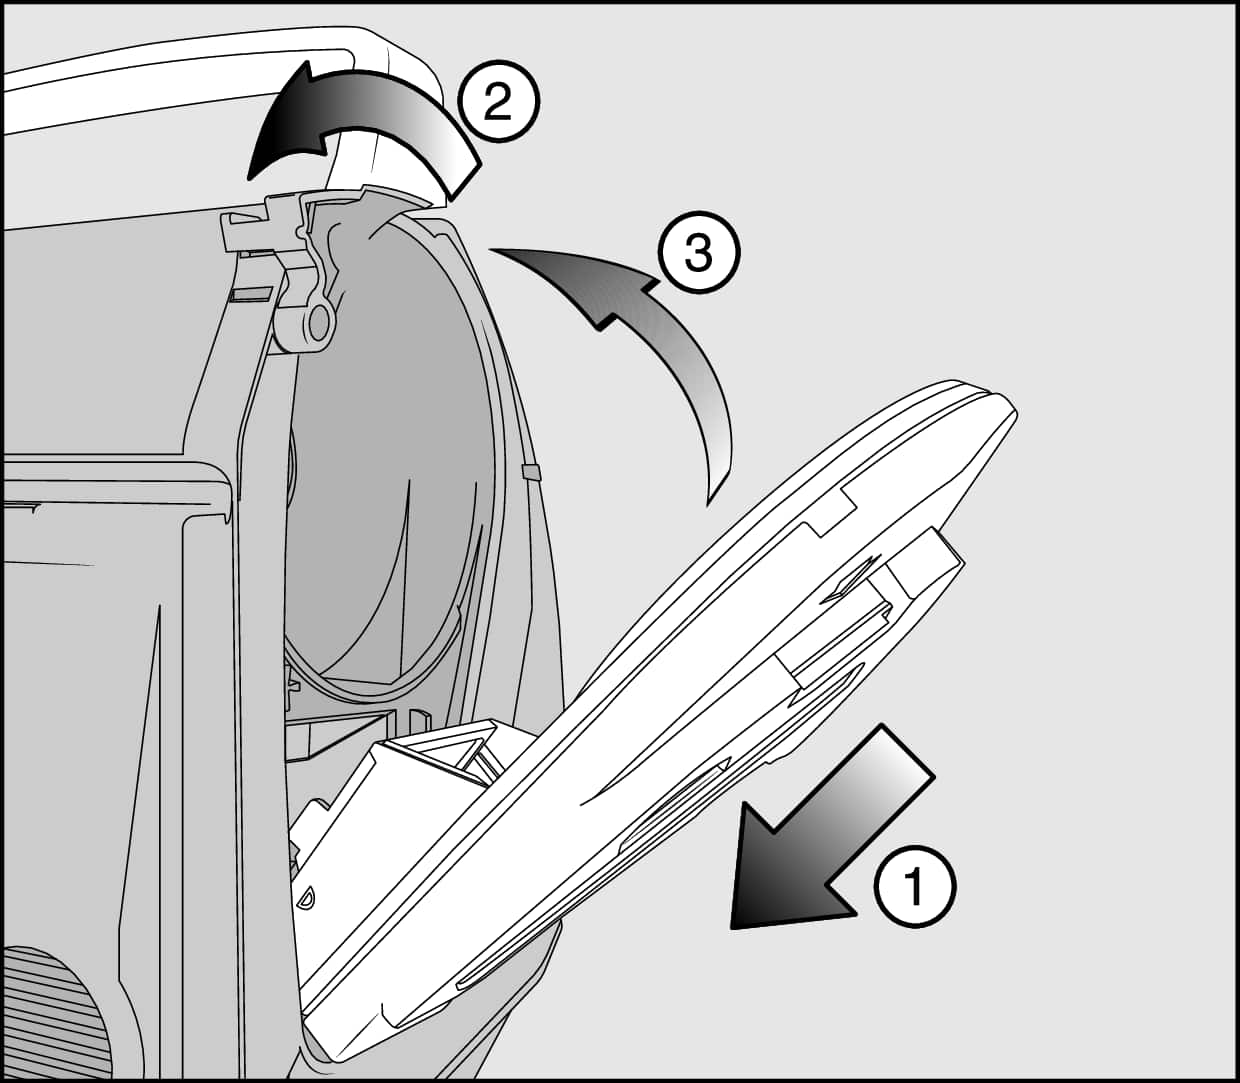
Lift up the dust container handle and hold it in this position (1).
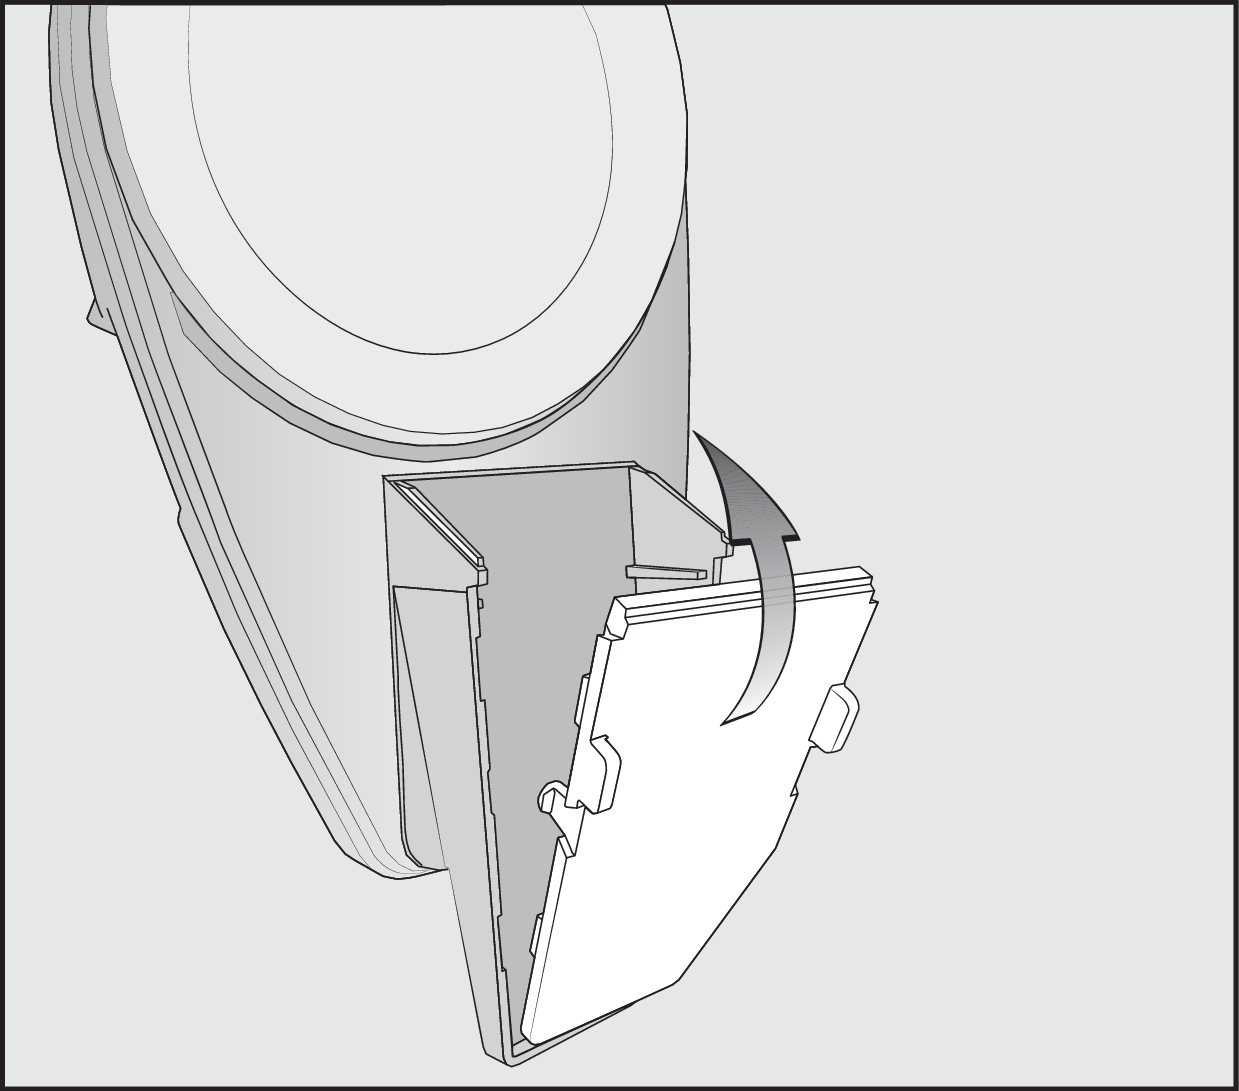
Press the release catch on the side flap. There is a cutout on the opposite side (2) to make it easier to remove the side flap.
Remove the side flap (3).
Once the side flap has been removed, the prefilter inside can be accessed.
Risk of damage caused by incorrect cleaning.
The prefilter can become damaged and be less effective as a result.
Do not use pointed or sharp-edged objects to clean the prefilter.
Clean the prefilter and the interior side walls using the cleaning tool.
If you need to clean the interior side walls, use a slightly damp all-purpose cloth and mild liquid dish soap.
Dry the interior side walls carefully.
The filter frame is located on the rear side of the removed side flap at the bottom.
Press the two release catches on the side of the filter frame and remove the filter.
Risk of damage caused by incorrect cleaning.
The filter can become damaged and be less effective as a result.
Do not use pointed or sharp-edged objects to clean the filter.
Clean the filter using the cleaning tool.
If you need to clean the filter frame and the side flap, use a slightly damp all-purpose cloth and mild liquid dish soap.
Dry the filter frame and the side flap carefully.
Reinsert the filter at the bottom of the dry filter frame and lock it, making sure it clicks into position.
Carefully insert the dry side flap with the filter frame at the bottom of the dust container (1).
Lift up the dust container handle and hold it in this position (2).
Press the side flap firmly into position (3).
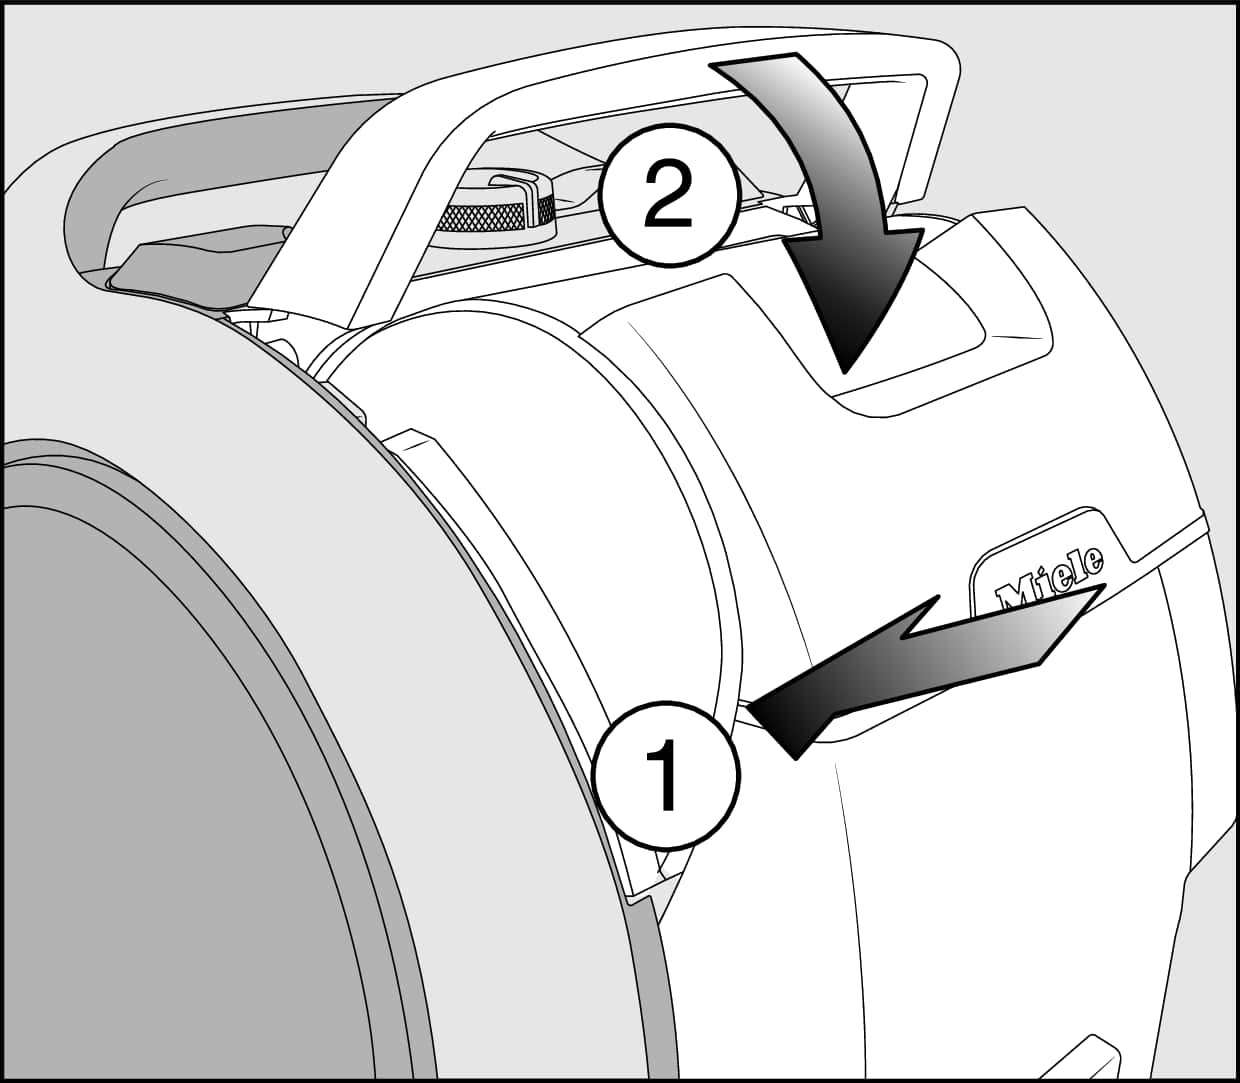
Insert the dry dust container back into the vacuum cleaner at an angle with the handle lifted up (1).
Latch the dust container into place by pushing the handle back down (2).
Replace the exhaust filter if necessary.
Depending on the model, your vacuum cleaner will be equipped as standard with one of the following exhaust filters:
Hygiene AirClean SF-HY 60 (turquoise): Replace this exhaust filter after approx. 1 year. Make a note of the date on the exhaust filter.
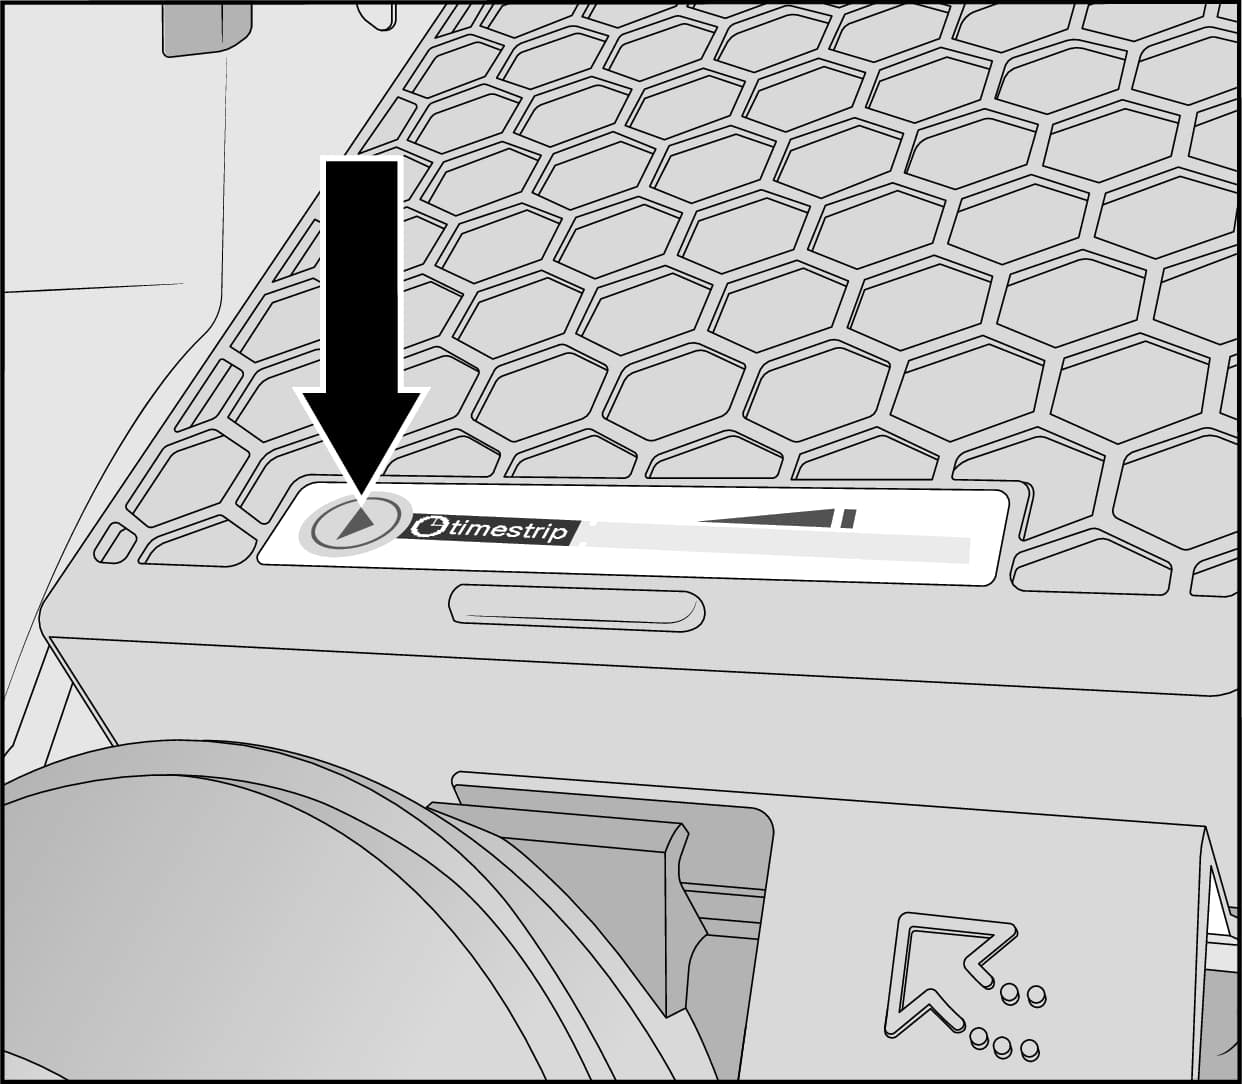
HEPA AirClean SF-HA 60 (white): Replace this exhaust filter when the timestrip® exhaust filter change indicator is completely red. The indicator will be completely filled with red after approximately 50 operating hours; this corresponds to approximately 1 year of average use. You can continue vacuuming in this case. However, the suction power will be reduced, as will the effectiveness of the filter.
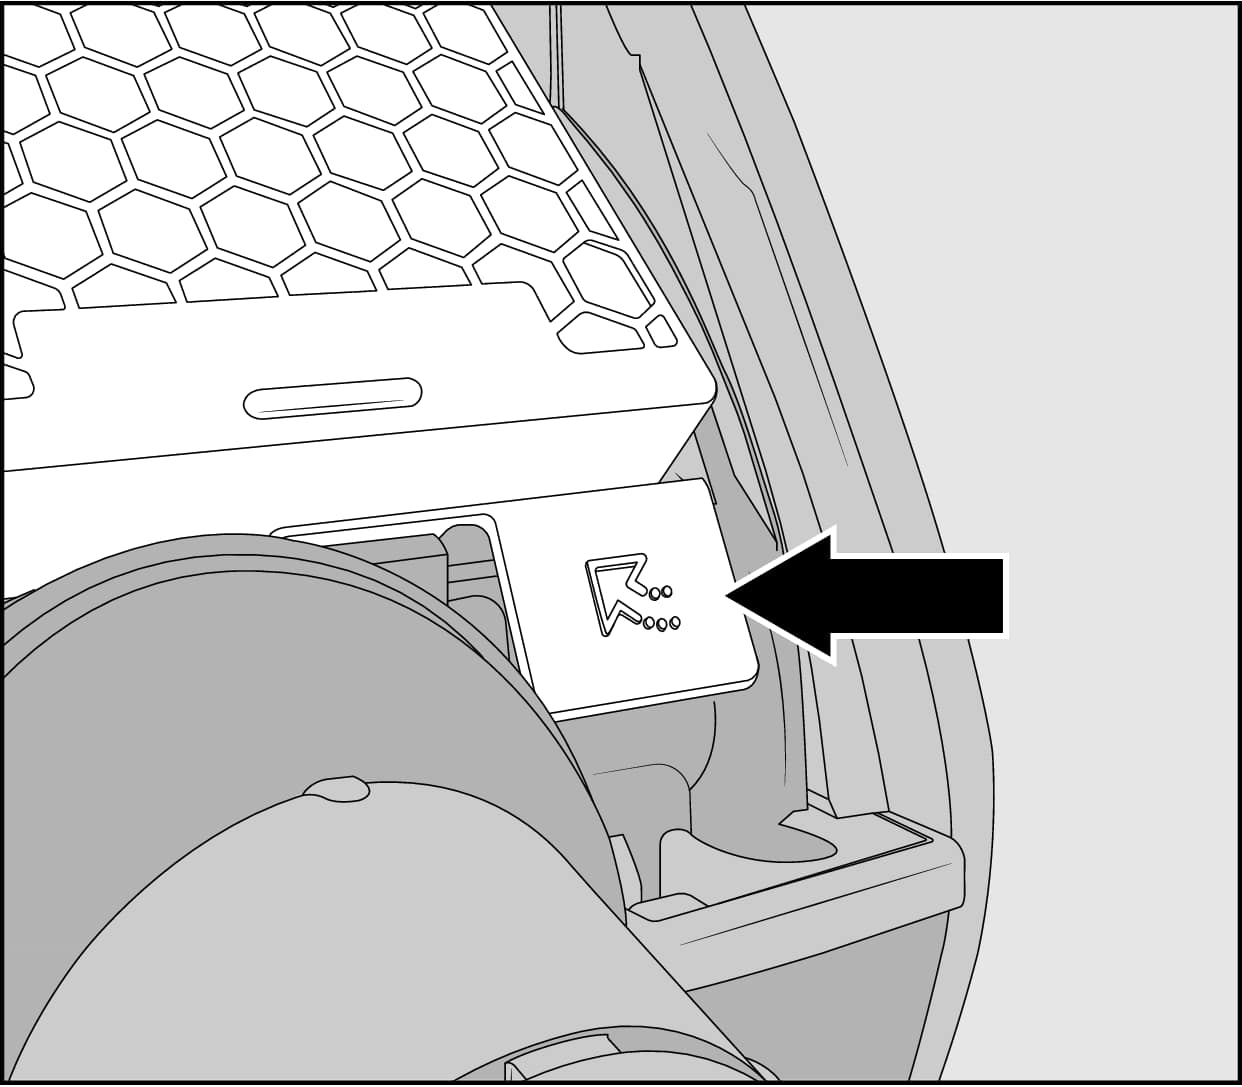
Press the release button on the exhaust filter compartment flap and remove the flap.
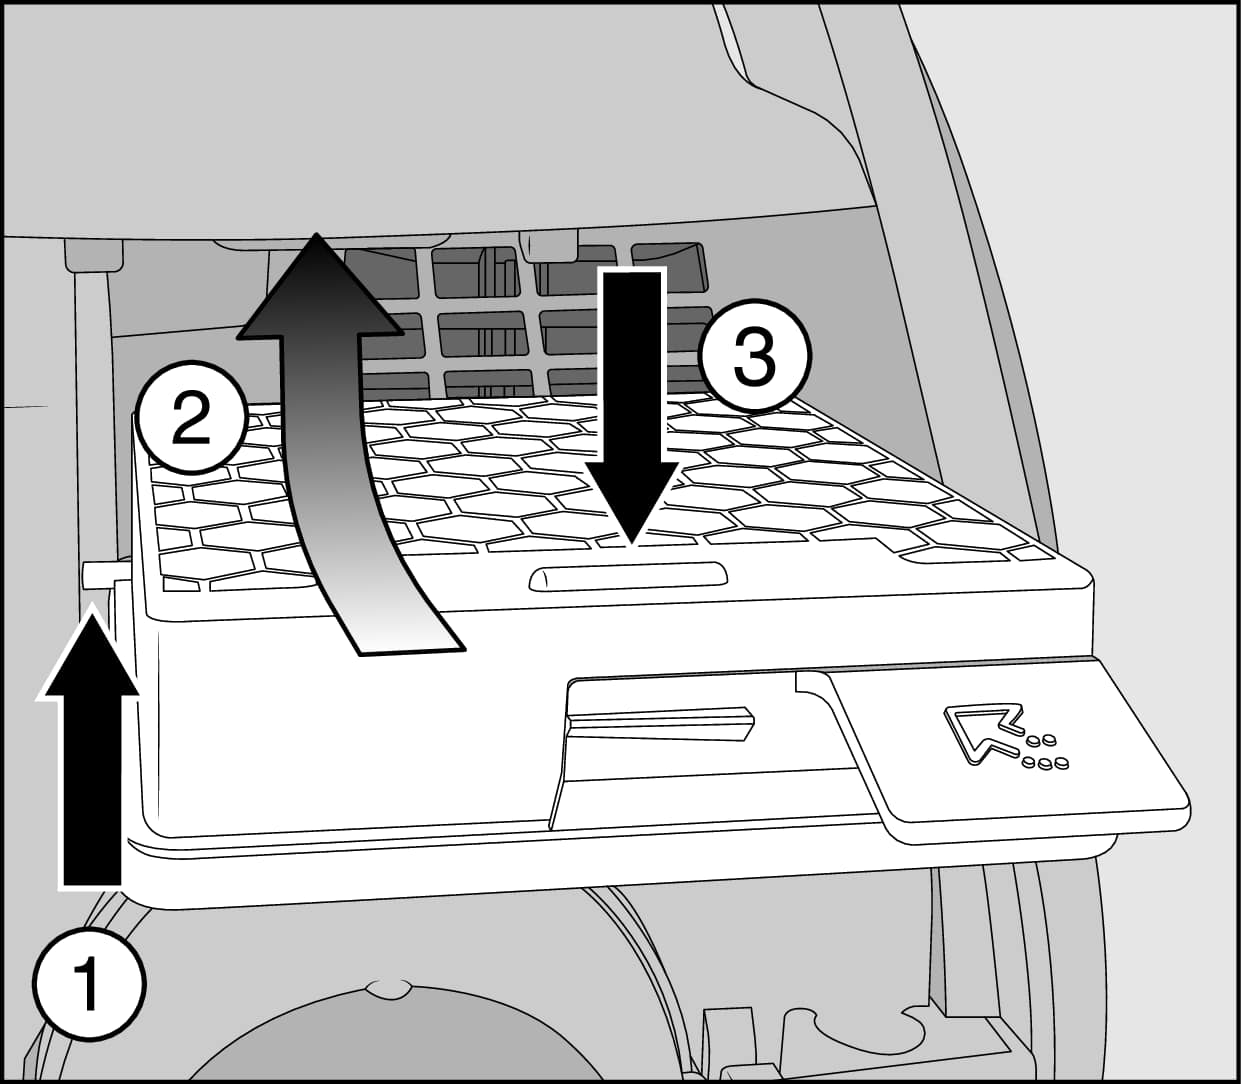
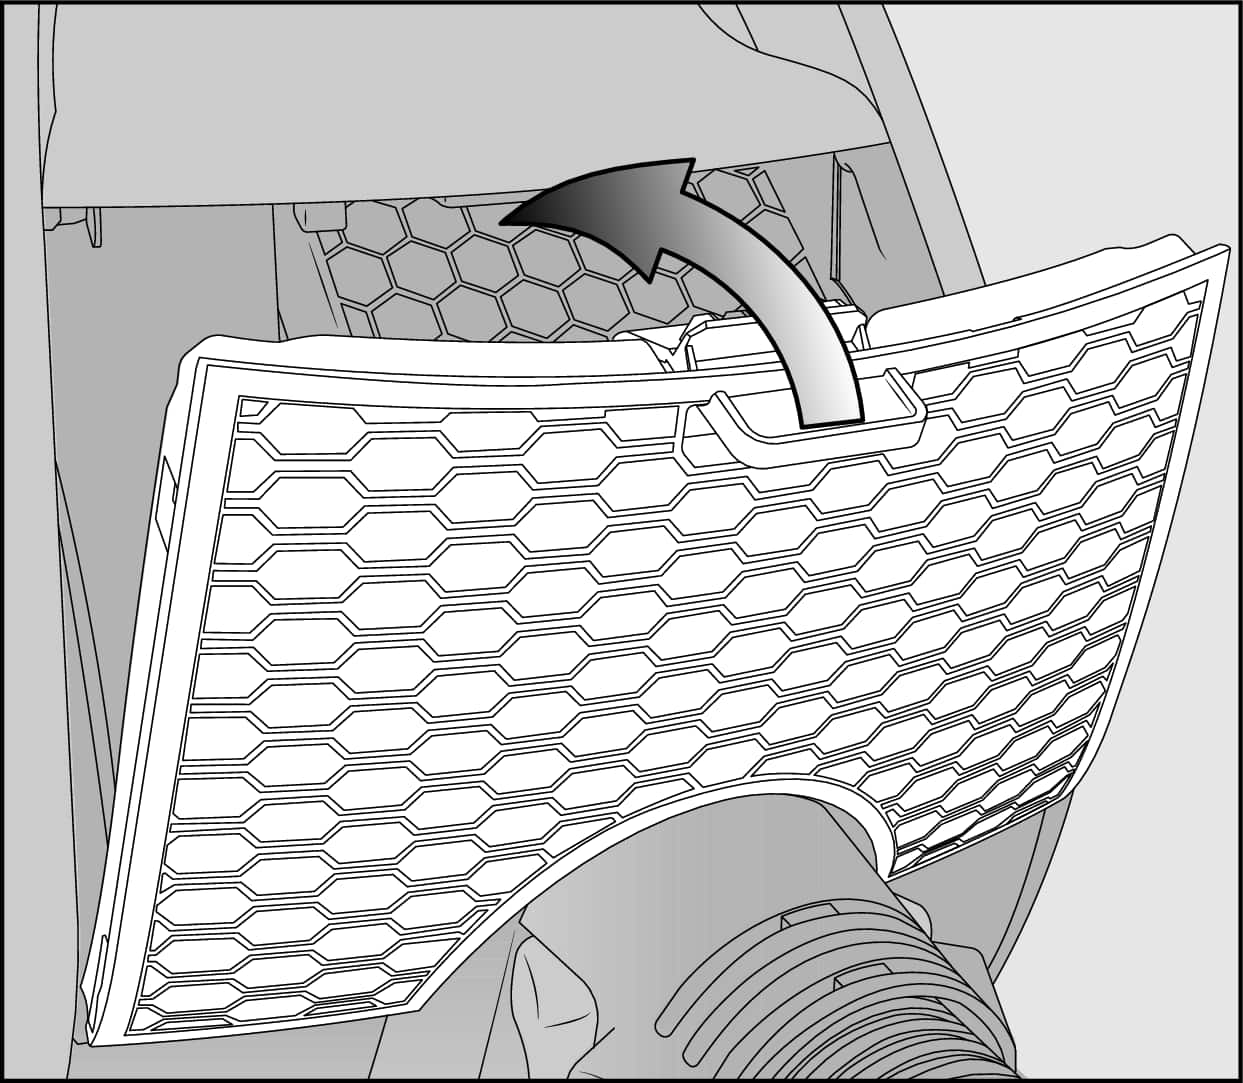
Pull the exhaust filter removal tab up and pull the exhaust filter forward to remove it.
Place the insertion aids that are located on both sides of the new exhaust filter into the guides on the exhaust filter compartment (1).
Push the exhaust filter back and up (2).
Press the exhaust filter firmly into position until it clicks into place (3).
If you have equipped your vacuum cleaner with a HEPA AirClean exhaust filter, press the timestrip® exhaust filter change indicator: Expiry date. Check suitability for series maintenance before use!
After approx. 10–15 seconds, a thin red line will appear on the left-hand side of the display.
Insert the exhaust filter compartment flap carefully in the bottom of the exhaust filter compartment and close the flap, making sure it clicks into position.
Additional information can be found in the linked video.
When using the turbobrush: The turbobrush is blocked.
Switch the vacuum cleaner off using the On/Off footswitch.
Remove the electrical plug from the socket.
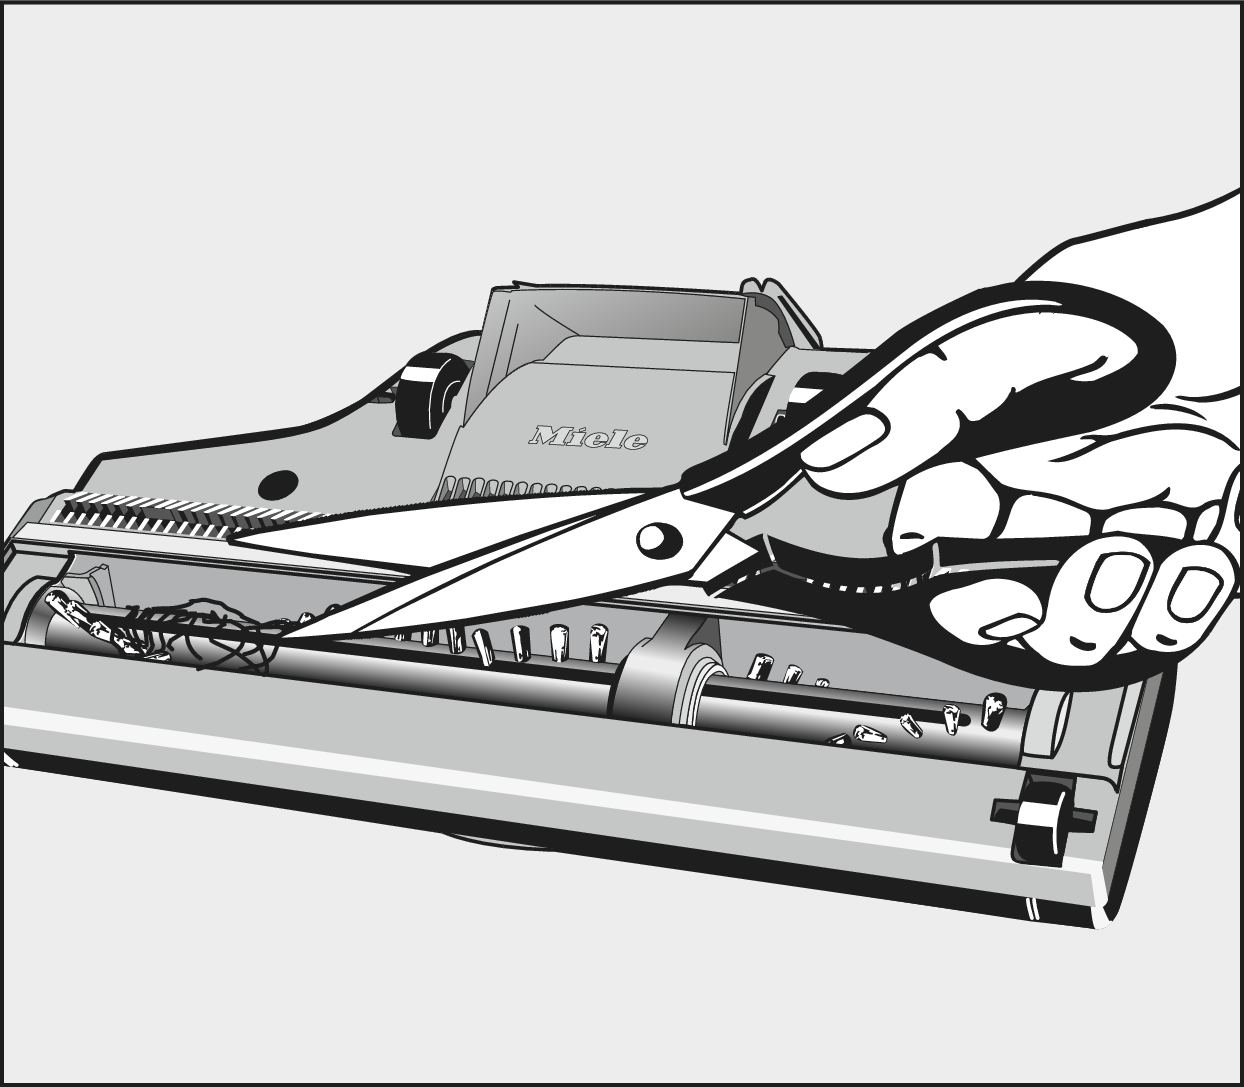
To remove threads and hairs, place the electrobrush upside down on a level, clean surface.
To guide the scissors, move along the guide track on the roller brush.
Use a pair of scissors to cut any threads or hairs that have wound themselves around the roller brush.
Then run the vacuum cleaner to vacuum up the cut threads and hairs.
When using the turbobrush: The turbobrush speed drops.
The turbobrush is driven by the suction flow of the vacuum cleaner. With tightly woven carpets, the speed of the turbobrush can drop because the suction inlet is so tightly enclosed by the carpet pile that the air flow does not circulate. The brushing effect may then not be satisfactory.
In this case, open the suction control valve by turning the large brush symbol to the circle marking (upper section of the figure).
In all other cases, the suction control valve must be closed so that the full suction power of the vacuum cleaner can act on the floor.
Close the suction control valve by turning the small brush symbol to the circle marking (bottom section of figure).
Manual finder
Here you will find the operating instructions for your Miele appliances.